Showing posts with label White Wine. Show all posts

Tuesday, July 10, 2018

Roasted Butternut Squash Ravioli with Shrimp in a White Wine Butter Sauce

I know I've done pasta posts but this is a bit different.  Some time back, I gave away my hand cranked pasta roller because we came across a good deal on the pasta roller attachment to the KitchenAid stand mixer.  This was the first time I've made pasta since buying that roller.  I must say, having two hands to work the pasta dough and being able to adjust the thickness knob on the fly make a huge difference.  As an extra, the grandbaby liked watching me run the dough through the roller.


I used my usual pasta recipe for the ravioli since I've found no need to try another.  To form the ravioli I used my Fantes Grandpa Dante's Ravioli Maker to make the ravioli.  I can recommend this ravioli maker without reservation. 
Ravioli filled and ready to cover
Besides the pasta, you'll need some roasted butternut squash.  In case you've never roasted butternut squash I'll include how I do it.  Cut the squash into 1/2 - 3/4 inch rounds.  Cut the rounds in half.  The skin can now be easily cut from the half round.  Cut the half round in half again cutting parallel to the initial cut.  Cut those pieces into cubes that are approximately the same size on all sides.  Put in a bowl until the whole squash is cubed.  Drizzle with olive oil and toss.  Add salt and pepper and toss.  Dump onto a baking sheet and spread out then place in a pre-heated 425F oven.  Cook for 20 minutes.  Remove from oven and turn the squash cubes.  Return pan of squash to the oven and cook another 10 minutes or until the desired degree of caramelization is achieved.  Remove from oven and  serve.

Boil in salted water
I used left over roasted butternut squash to make the ravioli.  I only had about a cup or so left over.  I warmed them up and mashed with a fork and called it good.  I used a slightly under filled #70 portion dipper to fill the ravioli.  I've since bought a #100 to be able to fill the ravioli without having to estimate the fill with the #70.
All sauced up and ready to serve
I rolled the pasta dough out to the #5 thickness with the KitchenAid pasta roller.  I didn't want to get too thin and risk the ravioli breaking.  Next time I think I'll go to #6 on the thickness to make the ravioli a bit lighter.  What seemed to work best was to roll out the two sheets for the top and bottom of the ravioli before starting to make it.  The first batch I rolled out the bottom sheet and put it on the form then rolled out the top.  Once the bottom sheet is on the ravioli form, use the mold to push down and form the pocket.  Put in the filling, making sure to not get it on the edges of the ravioli.  Place the top sheet of pasta over the form and press down.  Then roll over the form with a rolling pin to seal the ravioli and cut through the pasta.  Turn the form upside down over a lightly floured sheet pan and gently push the ravioli out of the form.  Add the ravioli to boiling water and cook about 5 minutes.
Plated up ready to eat
The shrimp and white wine butter sauce is fairly simple.  I used 36-41 size shrimp because that is what I had in the freezer.  Once thawed, I removed the tails and did a dry brine with a mix of salt and sugar for about 10 minutes.  Melt 4 Tbs of butter is a large skillet and add the shrimp.  Once the shrimp are half done, turn then add the white wine.  I eye balled it but used about 1/2 cup of white wine.  Once the wine has cooked down and the shrimp are done add another 2 - 3 Tbs of butter and add the ravioli.  Stir/toss the ravioli into the shrimp and the sauce and cook until the sauce thickens a bit.  The flour in the pasta water should help this.  If it doesn't thicken to your satisfaction you can use a little corn starch mixed in water to thicken the sauce.  Plate the ravioli with some shrimp and the white wine butter sauce and grate or shave some Parmesan cheese over the top.  Some crusty bread or a light salad is all you need to accompany this for a good meal.
A nicely filled ravioli
Give this a try and let me know what you think.


Uncle T


Tomato Pasta Ravioli with Italian Sausage Meatballs

I've made tomato pasta before to use as noodles but this time I saved some leftover pasta to make ravioli on the second night.  Here is the recipe for tomato pasta

I made the ravioli using Fantes Grandpa Dante's Ravioli Maker that is available here on Amazon.   The pasta was rolled out to the 5 thickness on the KitchenAid pasta roller.  A #100 portion scoop is a good size to use to fill the ravioli.

The filling for the ravioli is one I came up with some time back when I ran short of another filling and had a couple of empty ravioli shells left.  This filling is a mix of Greek yogurt and grated Parmesan cheese.  I use a 50/50 mix for my filling.  My base recipe is 1/2 cup each which should fill two dozen ravioli at least.  To make more it's easy enough to make as little or as much as you need using this ratio.

The meatballs that went with this dish are made from hot Italian sausage made it Uncle T's kitchen.  If you don't want to make sausage you can use any Italian sausage you choose.  I prefer hot Italian sausage for this dish but I imagine a sweet Italian sausage would be good if that is your preference.  I make the meatballs by using my #100 portion scoop.  Melt a some butter in a large skillet and add the meatballs.  Cook them until they are browned on all sides.
A skillet full of ready to serve goodness
To make the white wine butter sauce add three or four more tablespoons of butter to the skillet with the meatballs and when melted and bubbling add 1/2 to 3/4 cup of white wine.  It's always best to use a wine you enjoy drinking.  This time I used a sauvignon blanc.  By the time the wine has cooked down a bit the ravioli should be done and can be added to the skillet.  Don't bother draining the ravioli as you take it out of the pot.  The starches in the pasta water should help the sauce to thicken.  If it doesn't get as thick as you want mix a little corn starch and water then add it to the sauce and stir until it thickens.  Give the ravioli and the meatballs a good mix to get them well coated with the sauce and serve.
Plated up and ready to eat
Once you plate the ravioli and meatballs spoon a little sauce over them.  You can add a bit of grated Parmesan cheese over the top but it isn't really needed.

Give this this one a try and let me know what you think.  Remember, have fun in the kitchen.

Uncle T


Monday, June 19, 2017

Shrimp and Grits

According to all the history I can find, shrimp and grits was a breakfast meal in the low country.  It was as simple as its name.  While the grits were cooking, someone would head to the docks to buy freshly caught shrimp.  The shrimp would be boiled or cooked in bacon grease and then be served with the grits.  A great combination to get you through the day until supper.


As time went on, people started adding things to improve the flavor.  Eventually, restaurants got into the shrimp and grits game and most every chef will have their own take on the dish.  Today, shrimp and grits is a lunch or supper meal instead of a breakfast meal.  Just like chefs playing with the dish, most people have their own take on it though most are fairly similar.


A word on grits, use real grits for this dish.  The boy called a couple of weeks ago to relay something he'd found in a cook book.  He has inherited from both the good wife and me a love of good cooking and acquiring cook books.  He was looking for a recipe for shrimp and grits and found one in a Southern Living cook book that called for instant grits.  He knew that the proper thing in the grit eating world was regular stone ground grits that take 25 - 30 minutes to cook properly.  Instant and quick grits just don't have the proper flavor, texture, or consistency.


I've seen a few recipes for shrimp and grits that use sausage of some sort but most call for bacon.  Personally, I like using bacon for my shrimp and grits.  I made some Andouille sausage a week ago so I may use some of it for shrimp and grits just to experiment a bit.


Shrimp and Grits


1 lb peeled deveined shrimp, 25 - 30 count
6 slices thick cut bacon
1/2 medium onion, diced small
1/2 bell pepper, diced small
2 - 4 cloves garlic, minced
salt
pepper
cumin
cayenne
2 cups stone ground grits
2 cups water
2 cups whole milk
4 oz sharp cheddar cheese, grated
butter
white wine


For the grits, in a large pot combine the water, milk, and about a tablespoon of salt.  Turn heat to medium to medium-high and bring to a boil.  Slowly add the grits stirring constantly to avoid clumps.  Once the grits are fully stirred in bring the pot down to a simmer and put the lid on.  Stir every 3 - 5 minutes until the grits are tender and most of the liquid has been absorbed.  This can take from 20 - 30 minutes.  Once the grits are done, stir in the grated cheddar cheese a bit at a time for easier melting.


The shrimp can be done either with the tails or without.  Season them with salt, pepper, cumin, and cayenne according to your taste and let them sit while the bacon is cooking.  I go a bit light on the cumin and cayenne since I just want a hint of the flavors for the sauce.


In a large skillet, brown the bacon without getting it crispy.  Remove it from the skillet and let cool.  Once cool, chop it into small pieces.  Using the grease rendered from the bacon cook the onions, pepper, and garlic until they are soft and the onion is translucent.  Add the shrimp to the onion and pepper mixture, make sure they are in a single layer to cook uniformly.  Turn the shrimp when they are halfway done and add the bacon back to the skillet.  Add 2 - 3 Tbs of butter to the skillet and let melt then toss or stir to mix the butter in well.  Add about a 1/2 cup of white wine, I use the two glug method, and stir in.  Let the whole mixture simmer until it reduces to a nice sauce.  The sauce won't be thick but it will coat the back of a spoon good.  This should happen about the time the shrimp are done.


Spoon grits into a bowl.  Spoon some of the shrimp onto the grits and then add some of the sauce.  This should serve 4 people.  You can either pile the shrimp in the middle of the grits or line the edge of the bowl with them.  It just depends on the type of presentation you prefer.
A tasty bowl of shrimp and grits
Now, let me tell you how I don't follow my recipe.  I generally slice my bacon before I cook it.  I pull the slices from the package in a solid piece then slice it about 1/4 inch wide sections.  I put the sections in the skillet cut side down.  Once the bacon has been cooking for a bit, I mash the sections with my tongs and the individual pieces separate nicely.  I find I can get a more even color and doneness than doing whole slices.  I also use a bit of shrimp broth to cook my grits.  Whenever we have shrimp, the shell and tails get put in a bag in the freezer.  When I want shrimp and grits or gumbo, I dump the shrimp parts in the pressure cooker, cover them with water, and 30 minutes later I have some wonderfully shrimp broth.  For shrimp and grits, I substitute 1 cup of shrimp broth for 1 cup water.  I just want the hint of shrimp in the grits.  Another thing you can do, especially if you want a bit more bite to your grits is use some buttermilk in place of whole milk.  I tend to reserve this for when I'm short on sharp cheddar and don't want to run to the store to get more.  I also generally use 2 or 3 of the small sweet peppers that come in a mixed bag of yellow, orange, and red.  I have these on hand most times and I like the color variation.  I'll also pull some onions from the garden and use both the white and green part.


A variation I have used is to use some of my Sriracha bacon.  Since the Sriracha flavor is not really pronounced in my bacon I added a squirt of Sriracha to the skillet while I was building the sauce.  It turned out really nice and flavorful.


This is a rather simple recipe and a dish that lends itself to experimentation.  The only hard part is finding the patience to make a good pot of grits.  An old school Southerner won't consider it difficult to properly cook grits because that's what we grew up with.  If you want to know how seriously the South takes their grits, review the movie My Cousin Vinny.  Here's a quote from the movie, "No self-respectin' Southerner uses instant grits. I take pride in my grits."


So, give this recipe a try and let me know how you like shrimp and grits.


Uncle T


Sunday, August 28, 2016

Tomato Fettuccine with Shrimp and Asparagus

A good bit of the fruit and vegetables that we eat comes from our garden and fruit trees.  At the peak of each season the good wife is kept busy canning the excess so we can eat it throughout the year until the next harvest season.  Tomatoes have been coming in strong for a bit now and we have 17 pints of homemade ketchup and 11 quarts and 1 pint of tomatoes canned for making sauces or adding to stews.  Earlier in the season the good wife found a website, http://joybileefarm.com/making-tomato-powder-scratch/?utm_content=buffer67519&utm_medium=social&utm_source=facebook.com&utm_campaign=buffer, suggested an alternate use for the tomato skins that get removed prior to processing and canning.  The use she found was drying and grinding to powder to use for seasoning, thickening, etc.  Making powder was in lieu of composting or feeding to the chickens according to the website.  We'd always composted them.  The process is simple, put the tomato skins in a dehydrator or on a rack in the oven at the lowest temperature setting and letting dry until they were brittle.  Once they are brittle put in them in a food processor, blender, or spice mill.  I used the dry blade container for the Vitamix.  The powder is concentrated tomato flavor.
Tomato skins laid out ready to dry

Tomato powder
To this point we have about two cups of tomato powder and I was brainstorming on a use.  I've been trying flavored pastas with mixed results so I decided to use the same technique I'd used for some mushroom Fettuccine.  Once I had decided on pasta I Googled to see if tomato pasta was a thing.  Unsurprisingly, it was.  They all used tomato paste and it only seemed to be there to color the pasta and add a bare hint of flavor.  I figured my way would yield good flavor and color.
Tomato pasta freshly kneaded and ready to rest
What kind of pasta to make generated some discussion at work during a break.  The choices came down to cheese and shrimp stuffed ravioli or fettuccine.  I settled on fettuccine because it would be less labor intensive and I was wanting to use some asparagus that I had in the refrigerator.  I only had about 8 ounces of mushrooms on hand so I didn't have as many as I'd have liked.

Tomato Pasta with Shrimp and Asparagus

Pasta:
1.5 cups flour
1/2 cup + 2 Tbs tomato powder
3 large eggs
1 tsp salt
1 Tbs olive oil
2 Tbs water

1 lb 31-35 count shrimp
1 lb asparagus
1 medium onion
1/2 - 1 lb mushrooms
1 cup white wine
1 stick butter
salt
pepper
Italian seasoning

For the pasta:  Combine the flour, the tomato powder, and salt.  Make a well in the center and add the eggs, water, and olive oil.  Mix everything together until well combined and turn out on a floured surface.  Knead the pasta until it is smooth and elastic.  Wrap in plastic and let it sit for 20 minutes.  Divide into 4 pieces and roll to desired thickness and cut to the size you want.  After the pasta is cut place in well salted boiling water and cook until almost done.
Tomato pasta ready to run through the cutter
While the pasta dough is resting, cut the asparagus into bite size pieces, thinly slice the onion, and slice the mushrooms.  In 2 Tbs of  butter sautee the asparagus and onion, season to taste, and then place in a bowl.  Sautee the mushrooms in 2 Tbs of butter until they are done and put in the bowl with the asparagus and onion.  Place the shrimp in the skillet with the rest of the butter and put the pasta into the boiling water.  Cook the shrimp until almost done then add the rest of the ingredients back to the skillet.  Pour in the wine and stir to combine well.  Transfer the almost done pasta to the skillet.  Stir to combine the pasta and other ingredients.  The butter, wine, and pasta water will combine and make a sauce to coat everything.  Plate and serve.  This will serve 4 as an entree.
Tomato Fettuccine with Shrimp and Asparagus
If you don't have tomato powder, I believe tomato paste could be used for the same effect.  I would add a 6 oz can along with the wet ingredients and add additional flour to achieve the desired consistency.  I also think you could thinly slice Roma tomatoes and dry them until brittle and grind them into your own tomato powder.  I may have to break out the dehydrator to see how that works.
A tasty supper of Tomato Fettuccine with Shrimp and Asparagus
The final product had a distinct tomato flavor that went well with the shrimp, asparagus, and wine sauce.  The color is nice as well.

Give this pasta a try along with whatever you think will go well with it or use this whole recipe.  Either way, let me know what you think of the tomato pasta.

Uncle T

Sunday, May 1, 2016

Sprouted Rice and Quinoa with Seafood in a White Wine Butter Sauce

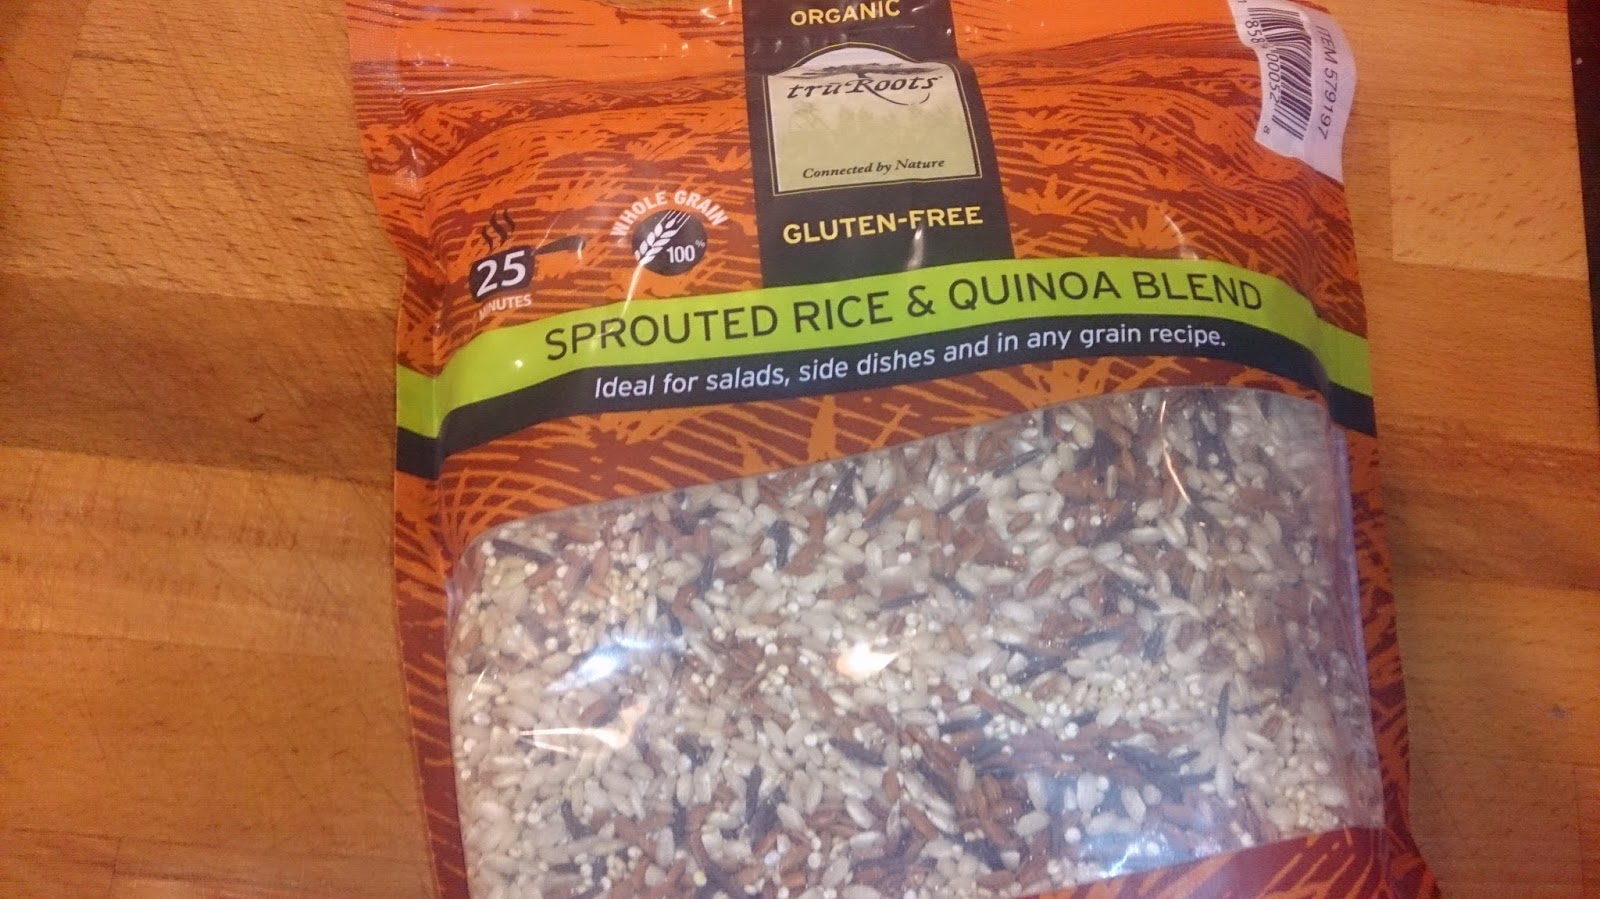
We were doing our grocery shopping this weekend and one of the stops was at BJs.  BJs is a warehouse store similar to Costco and Sam's Club.  One of the things on our list was rice so we checked to see if they had what we were wanting in a manageable size container.  As I turned into that aisle a package caught my eye.  I took a quick look then went further down to look at the rice.  As I returned I stopped to look a bit more closely at the package.  The reason it caught my eye was that it was Quinoa and Sprouted Rice.

Now, we've tried Quinoa since it was the Grain de Jour but weren't sufficiently impressed to continue paying for it.  I've been reading about the changes in both flavor and nutrition in sprouted grains but had not seen any for sale and hadn't tried sprouting my own.  The combo of the two intrigued me so we took a chance and bought the 3 lb bag.  What we got was made by Tru Roots.  If you are not near a store that carries it you can get it here, http://www.amazon.com/truRoots-Organic-Sprouted-Quinoa-Blend/dp/B008KAILNK.

Our next stop was at our favorite international market, Grand Mart, in search of dried mushrooms for a project I have in mind.  I know I've mentioned this store before.  They carry predominantly Asian products and have an excellent fish market.  As we came through the door, my good wife pointed out a sign advertising a sale on squid.  Needless to say, we both got excited.

We ended up getting some squid to use for our Sunday dinner and a nice octopus for supper on Monday.  Yep, expect that post to follow shortly.

Cleaned Squid ready to skin and cut up
I still hadn't decided what I was going to do with the squid until we got home from church Sunday morning.  I had two choices which were pasta with the squid or use the sprouted rice and quinoa blend.  When presented the choice, the good wife chose the sprouted rice and quinoa blend.  After that it was time to get busy.

I cooked the sprouted rice and quinoa in the pressure cooker.  I set it for 7 minutes rather than the 6 minutes for regular rice and let it lose pressure naturally while everything else cooked.  The only extra added to this was the olive oil I used to keep it from foaming.  Once it was done the sprouted rice and quinoa had a nice texture and good flavor.  The texture was slightly chewier than al dente pasta, just enough to know you had something substantial without being tiresome.  The flavor was lightly toasted and quite enjoyable.
A bowl of Sprouted Rice and Quinoa ready for the Seafood and Sauce
So without further ado, let's get into the recipe.

Sprouted Rice and Quinoa with Seafood in a White Wine Butter Sauce

Sprouted Rice and Quinoa
Water
1 lb peeled deveined shrimp, tails removed
1 lb fresh squid, cut in 1/4 inch rings
8 oz baby bella mushrooms, sliced
1 stick butter
1/3 cup Parmesan cheese, grated
1 cup white wine
3 cloves garlic, minced
salt
pepper
fresh herbs, minced (basil, thyme, oregano, sage)

Cook sprouted rice and quinoa according to package directions.  If using an electric pressure cooker, use two cups of the sprouted rice and quinoa and water to the two cup line.  Set time for 7 minutes and allow to naturally release the pressure when the time is done.

While the rice and quinoa is cooking start the seafood and wine sauce.  Melt 1/2 stick of butter in a large skillet.  When it starts to bubble, add the mushrooms and cook until they get some color.  Once the mushrooms are done, add the shrimp and the rest of the butter.  Season the shrimp with salt, pepper, and garlic.  When the shrimp is half done add the squid and the fresh herbs.  After a minute of the squid cooking add the white wine.  Once the white wine is at a simmer add the Parmesan cheese and stir to mix.  Continue to simmer until reduced by half stirring frequently.
Shrimp, Squid, and Mushrooms in a White Wine and Butter Sauce
Once the white wine and butter sauce is reduced remove from heat.  Divide the sprouted rice and quinoa between 4 pasta bowls.  Spread the seafood and mushrooms around the mounds of sprouted rice and quinoa then pour the sauce over the grain mixture.  Garnish with minced parsley and serve.

A tasty filling lunch
Squid is one of those things that need to be cooked fast at a high temperature or a long time at a low temperature.  Simmering the sauce covers the long and low technique.  This gets the squid cooked without being overly chewy.

The good wife has enjoyed most everything I've come up with but this one seemed to make a serious impression.  She actually said this meal was restaurant worthy and was the sort of thing that people would pay serious money on.  Rare praise indeed.

Whether you use this recipe or not I think you should give the sprouted rice and quinoa a try.  It can be used in place of rice in most any dish and as the base for a healthy salad.  Eat it for the flavor and texture if not for the nutrition.  Give both the sprouted rice quinoa mixture and this recipe a try and I think you'll enjoy it.  If you do, let me know what you think.

Uncle T

Thursday, January 28, 2016

Canary Bean and Mussel Soup


A few days ago I wrote about getting mussels in a 10 lb bag in the post about Spicy Seafood Stew.  After I made that stew I still had 5 lbs of mussels in the refrigerator.  Being a frugal sort, I decided to go ahead and steam the remaining mussels in a pot with more white wine lest any go bad while I was deciding how to use them.  They were steamed using the method discussed here, Mussels in White Wine


After the mussels were steamed, I picked the meat from the shells and stored them in the wine broth for later use.  The wine and mussel liquor came to a little over 2 cups.


As for using the canary beans, I found them at our favorite ethnic grocery store, Grand Mart.  I was on the side of the store that is primarily foods from Hispanic regions and saw a good selection of dried beans.  Since the pressure cooker makes quick work of dried beans, I decided to see if there were some we hadn't tried before.  That's how I came to have canary beans at the house.


Of course with cold weather soup seemed to be a natural choice.  Having the primary ingredients on hand it was just a matter of deciding on additions to help flavor the soup.  This soup is the result.


Canary Bean and Mussel Soup


1 1/2 cup dried canary beans
meat from 5 lbs of mussels, steamed
4 - 6 oz bacon, diced
1 medium onion, finely minced
2 cups white wine broth from steaming mussels
2 cups water
2 - 3 bay leaves


Put dried beans in pressure cooker with the diced bacon and minced onion.  Pour in the white wine broth and water and stir.  Add the bay leaves and stir.  Put the lid on the pressure cooker and set timer to cook 40 minutes under pressure.  Allow pressure to naturally release.  Stir in mussels and let set until the mussels come up to the temperature of the soup.  Taste broth and add salt and pepper if desired.  Serve with hot crusty bread.  Makes 4 servings.


Canary bean and mussel soup
Cooking the canary beans with the pressure cooker for 40 minutes left them with a firm texture.  Next time I may add a few minutes to get the beans a bit softer.  They weren't under done they were just a bit firmer than we usually eat.  They were a nice contrast to the soft texture of the mussels.


If you don't have a pressure cooker then soak the beans over night and make the soup in a slow cooker.


For the bread I used the same recipe referenced in the link above with the same changes.  The changes are after proofing and bake time.  After proofing divide the dough in half and roll into long loaves.  Use the same time for the second proofing.  Bake at the same temp but only for 25 - 30 minutes.


We finished this soup last night.  It reheated well and as usual the flavors melded to make the soup better the second time.  A slow reheat also kept the mussels from getting tough.


Give this soup a try as a way to get more beans into your diet, not to mention an excellent use for mussels.  I think you'll like this soup.  If you fix it, let me know how you liked it.


Uncle T


Wednesday, January 27, 2016

Mussels in White Wine

One of our favorite ways to eat mussels is to cook them in white wine then serve them with some fresh hot crusty bread.  This is a simple method but the results are outstanding.  I wasn't going to write about this but it was requested.


You need to make sure your mussels are clean and still living.  If you are lucky, you can get your mussels at a fish market where they are loose and the fish monger will cull them for you.  Most places seem to sell them in 2 lb bags.  I recommend getting 1 lb per person.  The culling process is simple, make sure they are closed tight.  If they are gaping, tap them on the counter to see if they close.  If they don't, set them aside.  I'll also say wait till you're ready to cook them before you cull them so you can clean them at the same time.  To clean them, rinse off any loose sand or barnacles and remove the beards.  The beards look like wiry tangles sticking out of the shell.  Just grab it and pull.  Once you have culled and cleaned all your mussels give them a final rinse.
Mussels cleaned and ready to steam
 As for the wine, use one that you would like to drink.  As a matter of fact, a glass of the same wine you cook them with is a nice accompaniment.  Remember, don't think you have to look for a certain price point on a bottle of wine to get a good one.  A really good wine can be had for $10 - $12.  If you are not familiar with white wines, go to a store that has a Sommelier or at least a store that wine is their business.  Let them know what you are wanting the wine for and your price range and they'll be able to point you to some good choices.

A good white wine for mussels
You will also need some fresh herbs for your bouquet garni.  There are specific herbs and amounts to use if you want a traditional French bouquet garni but you can use what you want in your own cooking.  A bouquet garni is nothing more than a bundle of fresh herbs to provide flavor and aroma that is removed prior to serving.  The simplest way to make it is to put your herbs together and tie the bundle with two pieces of cotton kitchen twine.  Make sure you use 100% cotton twine.
Thyme, Sage, Rosemary, Basil
Mussels in White Wine


Mussels, cleaned, 1 - 1.5 lbs per person
4 - 6 cloves garlic, finely minced
2 - 3 Tbs olive oil
bouquet garni
     Sage
     Basil
     Thyme
     Rosemary
White Wine, 1/2 bottle


Put olive oil and garlic in a large skillet and turn on medium heat.  Cook garlic until it starts smelling good.  Add the bouquet garni and heat it, turning it so all sides are in the heat.  Pour in the half bottle of wine and increase heat to med-high.  Once the wine starts to simmer, add the mussels and cover the skillet.  Let the mussels steam for 2 minutes then remove lid and stir the mussels around and replace lid.  Let them steam another 2 minutes or until all the mussels are open.  Spoon the mussels into wide bowls and divide the broth between them.  Serve with hot crusty bread.


Freshly steamed mussels ready to serve
I've also done them adding a minced shallot along with the garlic.  Looking at recipes online a lot of chef types like to add lots of things to the pan.  My method lets the mussels and wine combine so they are the stars.  After all, why add chicken broth or red pepper flakes, as they'll change or over power the flavor of the mussels.  I think chefs sometimes let their training get out of hand and they try to do too much.  Sometimes they need to remember a classic is a classic for a reason and not every dish needs a new flair.


A wonderful supper
The bread I usually make is a variation on this recipe, Skillet Bread.  I alter the final process and make French bread loaves.  The changes are after proofing and bake time.  After proofing divide the dough in half and roll into long loaves.  Use the same time for the second proofing.  Bake at the same temp but only for 25 - 30 minutes.This bread also reheats well if you happen to have any left.


Nothing here is new or innovative when it comes to mussels but I do believe that the simplicity of this recipe is what makes the dish worth it.  Sometimes doing less is more.


If you've not tried mussels before then this is a good dish to start with.  It comes together quickly and it gets you involved with your meal by having to hold the shell while you get the meat out.  Give this a try and let me know what you think.


Uncle T