Showing posts with label Seafood. Show all posts

Wednesday, January 16, 2019

Salmon and Grits?

I'm sure most have heard of shrimp and grits.  If you haven't, you can check it out at Shrimp and Grits.

A gal in a Facebook cooking group had tried to make shrimp and grits and had been disappointed with her results.  She posted what she'd done and asked for advice.  Her next effort had focused on the grits.  She got them right and instead of shrimp had sautéed mixed vegetables and topped it with a bit of salmon.  That got the ideas going.

My bok choy had been running rampant in the garden and due to the warm weather each plant was starting to bolt.  When a leafy green bolts it is sending up shoots to flower.  Depending on the plant bolting can render the favorable part of the plant bitter.  I decided to use the bok choy in this departure from shrimp and grits.  Some of the flower clusters were used as garnish to add color and an extra bit of texture to the dish.

This recipe will be for two with the exception of the grits.  There are excellent uses for leftover grits or you can increase the other to make enough for four.  Oh by the way, use real grits for the best result.

Salmon and Grits

1 cup grits
4 cups water
salt
2 cups shredded cheddar cheese

1 head bok choy
1 medium onion, sliced
3 slices bacon, cut into 1/4 inch strips

2 pieces of salmon, 6oz each
butter
salt
pepper

Bring the water to a boil and add a bit of salt then stir in the grits.  Reduce heat and simmer covered for 25 minutes stirring occasionally.  When done, stir in the cheddar cheese and keep warm.

Cut the root end of the bok choy.  Slice the bok choy in 1/2 inch strips across the width of the leaf and stalk.  In a large skillet, cook the bacon slowly to render the fat.  When the bacon is almost crisp, add the sliced onion and cook until it starts to turn translucent.  Add the sliced bok choy and turn to mix well.  Cook until the leaves are well wilted.  Add salt and pepper to taste.

Melt butter in a skillet.  Place the salmon in the hot skillet skin side down.  Salt and pepper the flesh side.  Turn when cooked halfway through.  An alternative way can be found at Pan Fried Salmon.

Put the cheesy grits in a wide shallow bowl for best effect.  Place the bok choy in a strip across the middle of the grits.  Top with a piece of salmon.
Salmon and Grits with bok choy flowers as garnish
I think you'll enjoy this alternative way to use both grits and salmon in your menu rotation.  I did this a week later using Mahi Mahi and it was just as good.  I think this method will work with any seafood you choose to use.

Give it try and let me know what you think.

Uncle T


Thursday, May 25, 2017

Shark and shrimp

I know I've mentioned my favorite store, Grand Mart, before.  One of the things I like about them is their seafood department.  They have a large selection of fresh seafood and a huge selection of frozen seafood.  They even have fish with which I am unfamiliar time to time.  If you can find a good seafood source near you then your culinary life is good.

I'd made the trip to Grand Mart myself to pick up a couple of things and just had to cruise through the seafood department.  Seafood wasn't on my list but, hey, me being me I have to check the seafood and meat departments at each visit.  Luckily for me, they had shard steaks on sale so I managed to grab the last two.  See what happens when I shop alone?
Shark and Shrimp ready for the grill
Usually when I grill shark I season it with just salt and pepper to let the flavor of the shark be foremost.  This time, I was wanting to experiment a bit so I decided to marinate the shark in Gochujang prior to grilling.  I then decided to marinate some shrimp in Doenjang and grill them as well.  To recap, Gochujang is Korean fermented red pepper paste used in many recipes and in making kimchi.  Doenjang is fermented soybean paste, basically the Korean version of miso.  Both have wonderful flavors to compliment most anything you want to cook.  Both the shark and the shrimp marinated for an hour and a half before they headed to the grill.
Shark and Shrimp on the grill
The shark and shrimp went on the grill at the same time.  Since I was using the gas grill I turned the side with the shrimp down so both would be done at the same time.  The shark was cooked to an internal temperature of 145 making it a nice medium.  The shrimp were cooked to color as usual.  As you can see in the picture, the Gochujang got cooked onto the shark as the water evaporated leaving a nice color to the shark steaks.  As a note, the spicy heat of the Gochujang is mellowed during the grilling so don't worry about it being overly spicy.  If you want more heat, make a finishing sauce using some Gochujang.
Shark and Shrimp are done
To accompany the shark and shrimp, we had Parmesan roasted potatoes and sliced carrots sautéed in butter.  I think they'd been equally as good served with some rice and kimchi or rice and water kimchi.
A tasty slightly spicy supper
If you have a Korean or even a generic Asian market near enough, get some Gochujang or Doenjang to add to your pantry.  They both work well with pork as well as seafood and can add a depth of flavor to soups and stews.  They can also be combined with other ingredients to make some interesting sauces.  Give one or both of these a go in your cooking and you'll be hooked.

Uncle T


Monday, September 12, 2016

Shrimp in a Peanut Garlic Sauce

By now, you've probably figured out that we enjoy the cuisine of many countries.  Indian food is no different.  We've always gone to an Indian restaurant since all the recipes I've looked at have always seemed either overly complicated or had several ingredients that I don't keep on hand and didn't know where to find.  There may be one but I've not found an Indian market close to us where I could get those ingredients.


I was looking around at Indian and Indian inspired recipes last week and I found one that had ingredients that I had or could alter to what I had on hand.  Using what I had on hand also changed both the texture and flavor profile.  We've decided that this is a keeper recipe.  I'm calling this an Indian inspired recipe because I adapted a recipe that was adapted from a curry cookbook that was written by an Indian Chef, 660 Curries.  From what I've read about the author I may have to get this book.


One of the key changes was in the peanut requirement.  The original called for blanched peanuts to be crushed and added to the sauce.  Those peanuts are rather flavorless and only provide a bit of texture to the sauce.  I decided to use some of our homemade mixed nut butter instead.  I leave a bit of graininess to this butter when I process it and the flavor is out of this world. 


This shrimp dish is good served over rice or cauliflower rice.  Not only that, it is quick and simple to make. 


Shrimp in Peanut Garlic Sauce


1 lb shrimp, peeled and deveined, size is your preference
1/2 - 1 tsp ground turmeric
1/4 cup nut butter
4 - 8 large cloves garlic
3 Thai chilies
2 Tbs canola oil
1 cup unsweetened coconut milk
salt
cilantro


Place shrimp in a bowl and sprinkle with ground turmeric to suit you.  I was using 35 - 40 size shrimp so I used a good teaspoon of turmeric.  Toss to coat well and let sit for 15 - 30 minutes.


While the shrimp is sitting, mince the garlic and chilies.  Add the oil to a skillet and bring up to medium heat.  Add the garlic and chilies and stir.  After they've cooked about a minute, add the nut butter and stir.


Once the nut butter, garlic, and chilies have browned a bit, stir in the coconut milk.  Be sure to shake the can before you open it.  Bring it up to a boil and reduce to a simmer.  Add salt to taste.  Simmer for 2 minutes and add the shrimp.  Bring back to a simmer and cook until shrimp are done, about 3 - 5 minutes.


Serve over rice or cauliflower rice and sprinkle with cilantro.
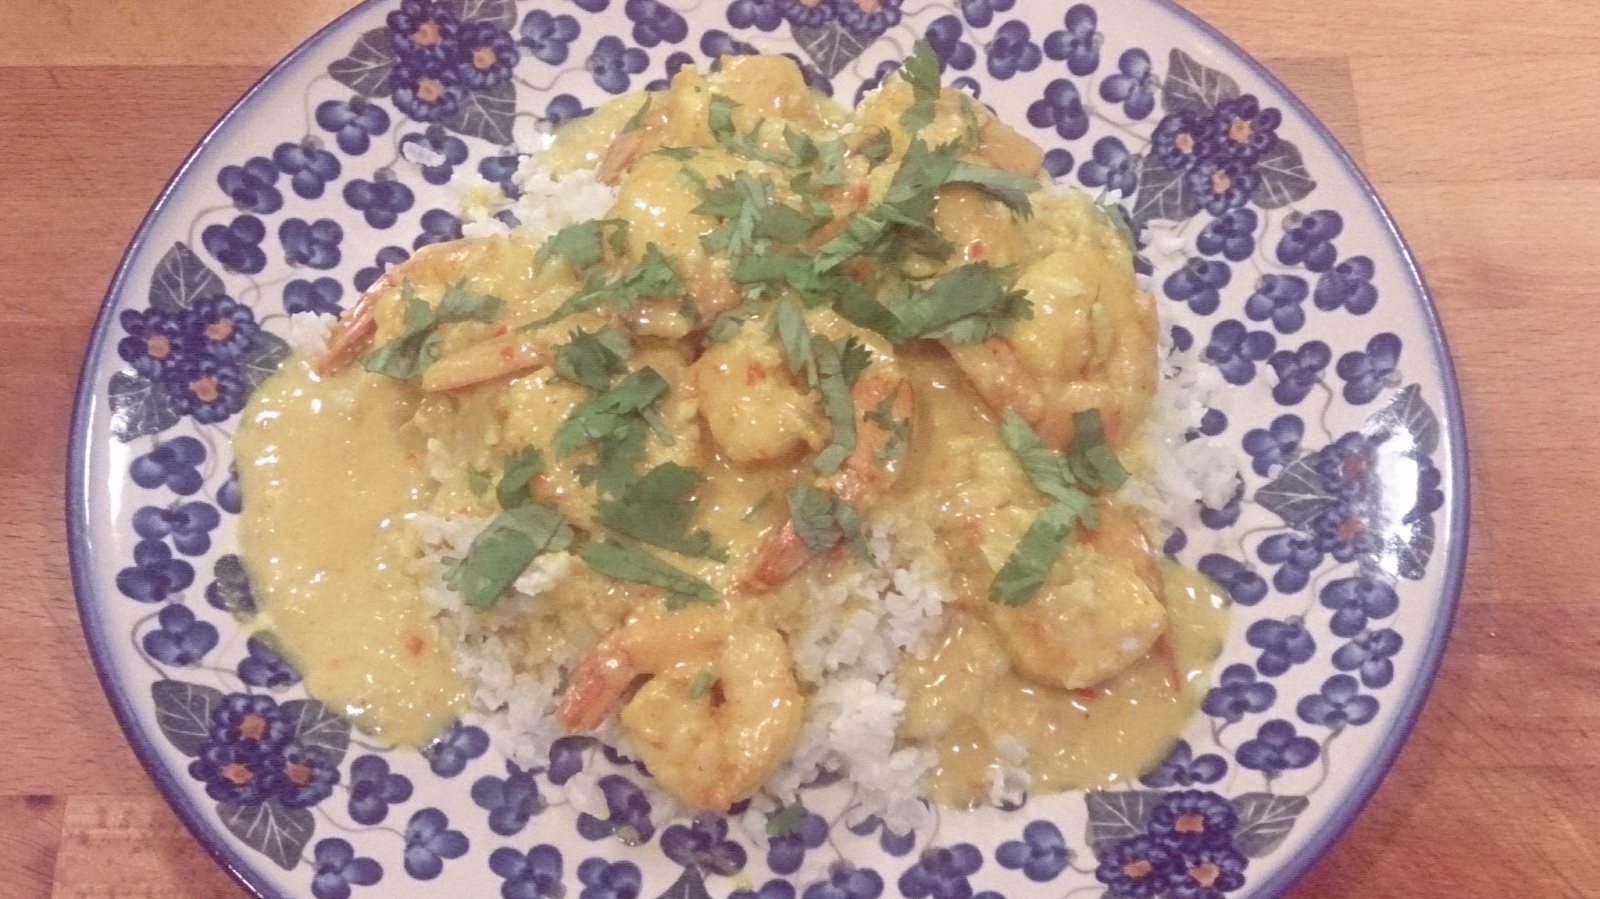
Shrimp in a Peanut Garlic Sauce over Cauliflower Rice
I used some of my dried Thai Dragon peppers instead of fresh peppers because I didn't grow any Thai peppers this year.  I just minced them up dry instead of rehydrating them.  If you can't find Thai peppers then cayenne peppers are a good substitute.  You should be able to find both at a good Asian store.


Give this recipe a try and expand your kitchen repertoire.

Sunday, August 28, 2016

Tomato Fettuccine with Shrimp and Asparagus

A good bit of the fruit and vegetables that we eat comes from our garden and fruit trees.  At the peak of each season the good wife is kept busy canning the excess so we can eat it throughout the year until the next harvest season.  Tomatoes have been coming in strong for a bit now and we have 17 pints of homemade ketchup and 11 quarts and 1 pint of tomatoes canned for making sauces or adding to stews.  Earlier in the season the good wife found a website, http://joybileefarm.com/making-tomato-powder-scratch/?utm_content=buffer67519&utm_medium=social&utm_source=facebook.com&utm_campaign=buffer, suggested an alternate use for the tomato skins that get removed prior to processing and canning.  The use she found was drying and grinding to powder to use for seasoning, thickening, etc.  Making powder was in lieu of composting or feeding to the chickens according to the website.  We'd always composted them.  The process is simple, put the tomato skins in a dehydrator or on a rack in the oven at the lowest temperature setting and letting dry until they were brittle.  Once they are brittle put in them in a food processor, blender, or spice mill.  I used the dry blade container for the Vitamix.  The powder is concentrated tomato flavor.
Tomato skins laid out ready to dry

Tomato powder
To this point we have about two cups of tomato powder and I was brainstorming on a use.  I've been trying flavored pastas with mixed results so I decided to use the same technique I'd used for some mushroom Fettuccine.  Once I had decided on pasta I Googled to see if tomato pasta was a thing.  Unsurprisingly, it was.  They all used tomato paste and it only seemed to be there to color the pasta and add a bare hint of flavor.  I figured my way would yield good flavor and color.
Tomato pasta freshly kneaded and ready to rest
What kind of pasta to make generated some discussion at work during a break.  The choices came down to cheese and shrimp stuffed ravioli or fettuccine.  I settled on fettuccine because it would be less labor intensive and I was wanting to use some asparagus that I had in the refrigerator.  I only had about 8 ounces of mushrooms on hand so I didn't have as many as I'd have liked.

Tomato Pasta with Shrimp and Asparagus

Pasta:
1.5 cups flour
1/2 cup + 2 Tbs tomato powder
3 large eggs
1 tsp salt
1 Tbs olive oil
2 Tbs water

1 lb 31-35 count shrimp
1 lb asparagus
1 medium onion
1/2 - 1 lb mushrooms
1 cup white wine
1 stick butter
salt
pepper
Italian seasoning

For the pasta:  Combine the flour, the tomato powder, and salt.  Make a well in the center and add the eggs, water, and olive oil.  Mix everything together until well combined and turn out on a floured surface.  Knead the pasta until it is smooth and elastic.  Wrap in plastic and let it sit for 20 minutes.  Divide into 4 pieces and roll to desired thickness and cut to the size you want.  After the pasta is cut place in well salted boiling water and cook until almost done.
Tomato pasta ready to run through the cutter
While the pasta dough is resting, cut the asparagus into bite size pieces, thinly slice the onion, and slice the mushrooms.  In 2 Tbs of  butter sautee the asparagus and onion, season to taste, and then place in a bowl.  Sautee the mushrooms in 2 Tbs of butter until they are done and put in the bowl with the asparagus and onion.  Place the shrimp in the skillet with the rest of the butter and put the pasta into the boiling water.  Cook the shrimp until almost done then add the rest of the ingredients back to the skillet.  Pour in the wine and stir to combine well.  Transfer the almost done pasta to the skillet.  Stir to combine the pasta and other ingredients.  The butter, wine, and pasta water will combine and make a sauce to coat everything.  Plate and serve.  This will serve 4 as an entree.
Tomato Fettuccine with Shrimp and Asparagus
If you don't have tomato powder, I believe tomato paste could be used for the same effect.  I would add a 6 oz can along with the wet ingredients and add additional flour to achieve the desired consistency.  I also think you could thinly slice Roma tomatoes and dry them until brittle and grind them into your own tomato powder.  I may have to break out the dehydrator to see how that works.
A tasty supper of Tomato Fettuccine with Shrimp and Asparagus
The final product had a distinct tomato flavor that went well with the shrimp, asparagus, and wine sauce.  The color is nice as well.

Give this pasta a try along with whatever you think will go well with it or use this whole recipe.  Either way, let me know what you think of the tomato pasta.

Uncle T

Wednesday, May 4, 2016

Grilled Octopus and Asparagus

The same day we got the squid mentioned here, 1 May post, we also got an octopus.  It's been a bit since we've done octopus so given the price it was too hard to resist.  The last octopus I finished in the skillet so I decided this one would be finished on the grill

I know, octopus has an ick factor for a lot of people in the US.  The  trouble is two-fold, octopus is not in the usual realm of seafood and too many Americans are just too squeamish when it comes to anything other than beef, pork, or chicken.
1.5 lb Octopus waiting for the water to boil
Part of the problem is that octopus done wrong is incredibly chewy.  I mean like chewing a rubber band chewy.  The same problems afflict squid.  I don't mind though, that means more squid and octopus for us at better prices.  I prefer an octopus in the 1.5 lb to 2 lb range for a meal for the good wife and me.


The octopus just needs to be simmered for a bit to tenderize it prior to finishing it in the manner you prefer.  This is also a good time to add some flavor to the octopus.  To do this you just add some aromatics to the pot as you bring the liquid up to a boil.  I use water for this though I know some folks use wine or a wine and water mix.  It's up to you.  The aromatics I use generally vary by what I have on hand at the time.  That means the recipe can be changed to suit what you have available.


Grilled Octopus


1 octopus for every two people
2 sweet peppers, cut in half
3 large cloves garlic, slightly crushed
1 Tbs salt
1.5 Tbs black peppercorns
1.5 Tbs juniper berries
2 cinnamon sticks
1 medium onion, quartered
water
olive oil


The octopus should come already cleaned unless you are buying at the dock.  Remove the beak if it hasn't been done.  Put enough water in a large pot to just cover the octopus.  Add all the other ingredients except for the olive oil and bring to a boil.  Once it has come to a boil, dip the octopus tentacles in the boiling water three times.  Keep the tentacles in the water for a few seconds each time you dip it.  This will ensure the tentacles curl up nicely.  After the third dip, if the tentacles are curled to your satisfaction, put the whole octopus in the boiling water.  Cover and reduce to a simmer.  Simmer the octopus until a sharp knife can penetrate the octopus fairly easily.  This is usually 60 - 90 minutes.  Once the octopus is to this point, remove it from the pot and set on a plate.  After the octopus is on the plate it's time to fire up the grill.  Get the grill good and hot.  Once the grill is hot, drizzle some olive oil on the octopus and place it on the grill.  Grill on one side for 5 - 10 minutes then turn the octopus over.  Grill for another 5 - 10 minutes.  Remove the octopus from the grill and cut in half.  Serve and enjoy.
Just off the grill
The wide range in grill time is so you can do it to suit your tastes.  The longer it is on the grill the more crispy bits there will be to add another bit of texture.


We had an asparagus dish to accompany the octopus.  I came up with this after having asparagus wrapped in prosciutto.  While I like prosciutto, it was not always readily available in some of the locations the Army had me stationed.  Enter the bacon.  Yes, I know the two are nothing alike.  Remember, I'm from small town South so bacon or bacon grease is in lots of different foods.  This is one of our favorite ways to eat asparagus though we don't do it all the time.  It is a great dish though.  I typically call it Transcendent Asparagus it is so good.


Transcendent Asparagus


1 lb asparagus
1 lb bacon
shredded mozzarella cheese


Prepare the asparagus by cutting off the tough bottom part.  Depending on the size of your asparagus divide it into bundles of 2 - 3 spears.  Wrap each bundle in bacon, using either a half slice or a whole slice.  Place the completed bundle in a baking pan and continue until all the bundles are wrapped.  Sprinkle a heavy layer of the shredded mozzarella on top of the bacon.  Put into a 400F oven for 20 minutes.  You can go shorter or longer depending on how dark you want the cheese to get.  Serve and enjoy.  3 or 4 bundles make a good side dish and this can serve 4 at that rate. 
All wrapped up and ready for cheese
A word of warning, if  you use whole slices of bacon you'll end up with quite a bit of bacon grease in the pan.  If you don't want to mess with the bacon grease in the pan you could partially cook the bacon prior to wrapping around the asparagus.  Using a half slice will yield less bacon grease but still be enough to cook the flavor into the asparagus.
Bacon wrapped Asparagus with Mozzarella Cheese ready for the oven
See, we match the unusual menu choices with things that are familiar.  This is the way most likely to get someone to try something different.  We had leftover sprouted rice and quinoa also which was a nice combo with the octopus and asparagus.  Roasted potatoes also go well with this meal instead of the grains if you prefer.
A fine supper
Give one or both of these a try.  I think you'll like them.  If you try them let me know what you think.


Uncle T


Sunday, May 1, 2016

Sprouted Rice and Quinoa with Seafood in a White Wine Butter Sauce

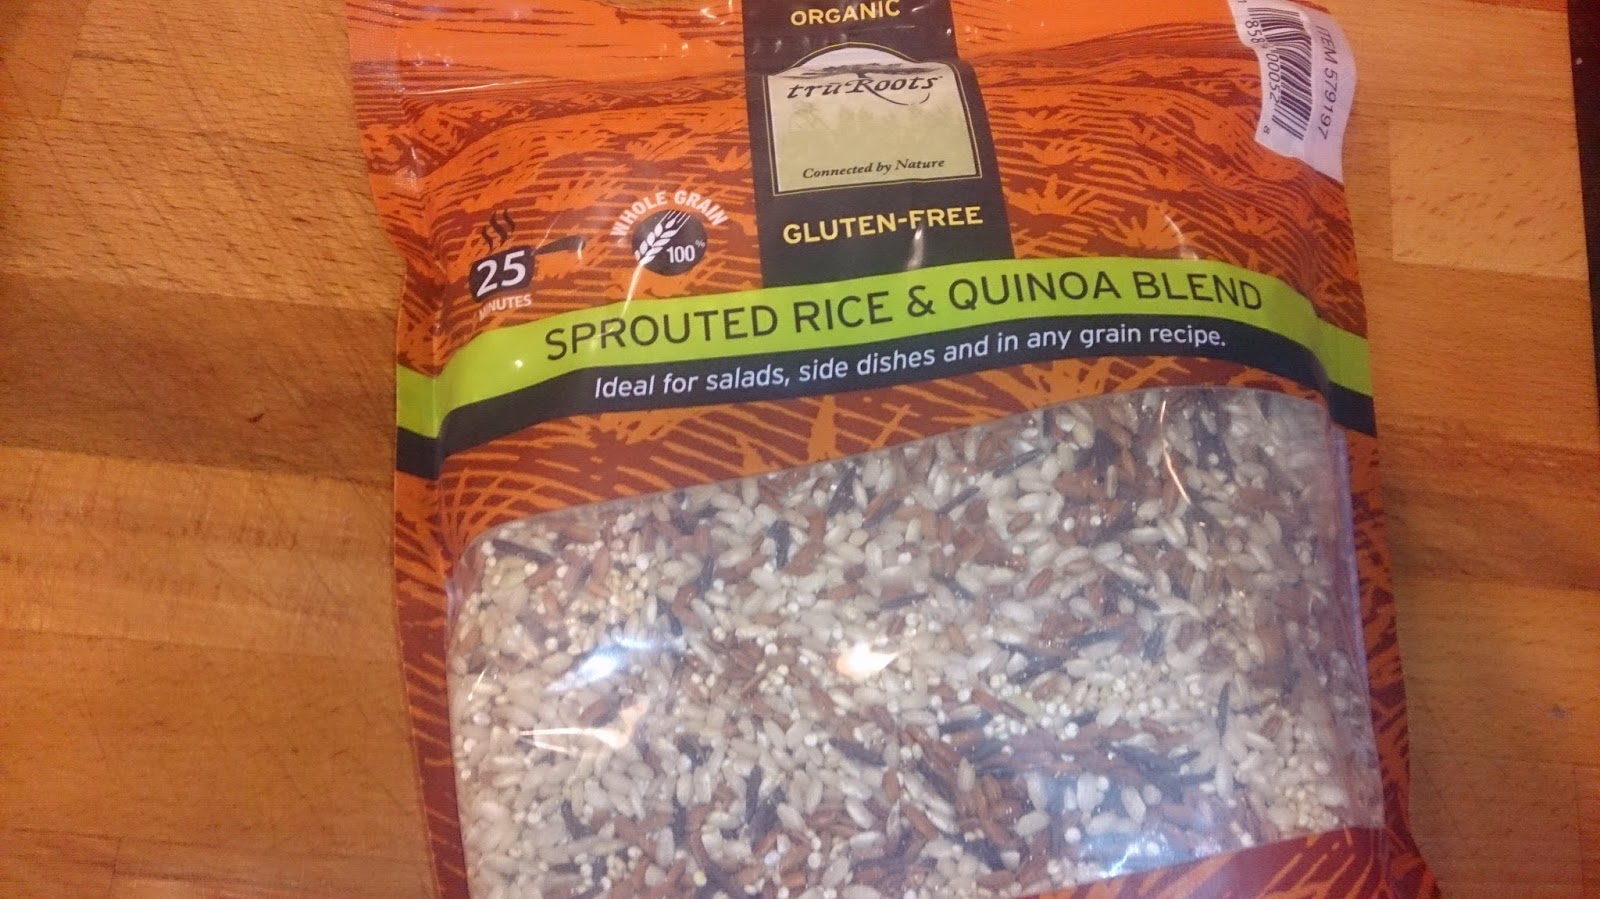
We were doing our grocery shopping this weekend and one of the stops was at BJs.  BJs is a warehouse store similar to Costco and Sam's Club.  One of the things on our list was rice so we checked to see if they had what we were wanting in a manageable size container.  As I turned into that aisle a package caught my eye.  I took a quick look then went further down to look at the rice.  As I returned I stopped to look a bit more closely at the package.  The reason it caught my eye was that it was Quinoa and Sprouted Rice.

Now, we've tried Quinoa since it was the Grain de Jour but weren't sufficiently impressed to continue paying for it.  I've been reading about the changes in both flavor and nutrition in sprouted grains but had not seen any for sale and hadn't tried sprouting my own.  The combo of the two intrigued me so we took a chance and bought the 3 lb bag.  What we got was made by Tru Roots.  If you are not near a store that carries it you can get it here, http://www.amazon.com/truRoots-Organic-Sprouted-Quinoa-Blend/dp/B008KAILNK.

Our next stop was at our favorite international market, Grand Mart, in search of dried mushrooms for a project I have in mind.  I know I've mentioned this store before.  They carry predominantly Asian products and have an excellent fish market.  As we came through the door, my good wife pointed out a sign advertising a sale on squid.  Needless to say, we both got excited.

We ended up getting some squid to use for our Sunday dinner and a nice octopus for supper on Monday.  Yep, expect that post to follow shortly.

Cleaned Squid ready to skin and cut up
I still hadn't decided what I was going to do with the squid until we got home from church Sunday morning.  I had two choices which were pasta with the squid or use the sprouted rice and quinoa blend.  When presented the choice, the good wife chose the sprouted rice and quinoa blend.  After that it was time to get busy.

I cooked the sprouted rice and quinoa in the pressure cooker.  I set it for 7 minutes rather than the 6 minutes for regular rice and let it lose pressure naturally while everything else cooked.  The only extra added to this was the olive oil I used to keep it from foaming.  Once it was done the sprouted rice and quinoa had a nice texture and good flavor.  The texture was slightly chewier than al dente pasta, just enough to know you had something substantial without being tiresome.  The flavor was lightly toasted and quite enjoyable.
A bowl of Sprouted Rice and Quinoa ready for the Seafood and Sauce
So without further ado, let's get into the recipe.

Sprouted Rice and Quinoa with Seafood in a White Wine Butter Sauce

Sprouted Rice and Quinoa
Water
1 lb peeled deveined shrimp, tails removed
1 lb fresh squid, cut in 1/4 inch rings
8 oz baby bella mushrooms, sliced
1 stick butter
1/3 cup Parmesan cheese, grated
1 cup white wine
3 cloves garlic, minced
salt
pepper
fresh herbs, minced (basil, thyme, oregano, sage)

Cook sprouted rice and quinoa according to package directions.  If using an electric pressure cooker, use two cups of the sprouted rice and quinoa and water to the two cup line.  Set time for 7 minutes and allow to naturally release the pressure when the time is done.

While the rice and quinoa is cooking start the seafood and wine sauce.  Melt 1/2 stick of butter in a large skillet.  When it starts to bubble, add the mushrooms and cook until they get some color.  Once the mushrooms are done, add the shrimp and the rest of the butter.  Season the shrimp with salt, pepper, and garlic.  When the shrimp is half done add the squid and the fresh herbs.  After a minute of the squid cooking add the white wine.  Once the white wine is at a simmer add the Parmesan cheese and stir to mix.  Continue to simmer until reduced by half stirring frequently.
Shrimp, Squid, and Mushrooms in a White Wine and Butter Sauce
Once the white wine and butter sauce is reduced remove from heat.  Divide the sprouted rice and quinoa between 4 pasta bowls.  Spread the seafood and mushrooms around the mounds of sprouted rice and quinoa then pour the sauce over the grain mixture.  Garnish with minced parsley and serve.

A tasty filling lunch
Squid is one of those things that need to be cooked fast at a high temperature or a long time at a low temperature.  Simmering the sauce covers the long and low technique.  This gets the squid cooked without being overly chewy.

The good wife has enjoyed most everything I've come up with but this one seemed to make a serious impression.  She actually said this meal was restaurant worthy and was the sort of thing that people would pay serious money on.  Rare praise indeed.

Whether you use this recipe or not I think you should give the sprouted rice and quinoa a try.  It can be used in place of rice in most any dish and as the base for a healthy salad.  Eat it for the flavor and texture if not for the nutrition.  Give both the sprouted rice quinoa mixture and this recipe a try and I think you'll enjoy it.  If you do, let me know what you think.

Uncle T

Thursday, January 28, 2016

Canary Bean and Mussel Soup


A few days ago I wrote about getting mussels in a 10 lb bag in the post about Spicy Seafood Stew.  After I made that stew I still had 5 lbs of mussels in the refrigerator.  Being a frugal sort, I decided to go ahead and steam the remaining mussels in a pot with more white wine lest any go bad while I was deciding how to use them.  They were steamed using the method discussed here, Mussels in White Wine


After the mussels were steamed, I picked the meat from the shells and stored them in the wine broth for later use.  The wine and mussel liquor came to a little over 2 cups.


As for using the canary beans, I found them at our favorite ethnic grocery store, Grand Mart.  I was on the side of the store that is primarily foods from Hispanic regions and saw a good selection of dried beans.  Since the pressure cooker makes quick work of dried beans, I decided to see if there were some we hadn't tried before.  That's how I came to have canary beans at the house.


Of course with cold weather soup seemed to be a natural choice.  Having the primary ingredients on hand it was just a matter of deciding on additions to help flavor the soup.  This soup is the result.


Canary Bean and Mussel Soup


1 1/2 cup dried canary beans
meat from 5 lbs of mussels, steamed
4 - 6 oz bacon, diced
1 medium onion, finely minced
2 cups white wine broth from steaming mussels
2 cups water
2 - 3 bay leaves


Put dried beans in pressure cooker with the diced bacon and minced onion.  Pour in the white wine broth and water and stir.  Add the bay leaves and stir.  Put the lid on the pressure cooker and set timer to cook 40 minutes under pressure.  Allow pressure to naturally release.  Stir in mussels and let set until the mussels come up to the temperature of the soup.  Taste broth and add salt and pepper if desired.  Serve with hot crusty bread.  Makes 4 servings.


Canary bean and mussel soup
Cooking the canary beans with the pressure cooker for 40 minutes left them with a firm texture.  Next time I may add a few minutes to get the beans a bit softer.  They weren't under done they were just a bit firmer than we usually eat.  They were a nice contrast to the soft texture of the mussels.


If you don't have a pressure cooker then soak the beans over night and make the soup in a slow cooker.


For the bread I used the same recipe referenced in the link above with the same changes.  The changes are after proofing and bake time.  After proofing divide the dough in half and roll into long loaves.  Use the same time for the second proofing.  Bake at the same temp but only for 25 - 30 minutes.


We finished this soup last night.  It reheated well and as usual the flavors melded to make the soup better the second time.  A slow reheat also kept the mussels from getting tough.


Give this soup a try as a way to get more beans into your diet, not to mention an excellent use for mussels.  I think you'll like this soup.  If you fix it, let me know how you liked it.


Uncle T


Wednesday, January 27, 2016

Mussels in White Wine

One of our favorite ways to eat mussels is to cook them in white wine then serve them with some fresh hot crusty bread.  This is a simple method but the results are outstanding.  I wasn't going to write about this but it was requested.


You need to make sure your mussels are clean and still living.  If you are lucky, you can get your mussels at a fish market where they are loose and the fish monger will cull them for you.  Most places seem to sell them in 2 lb bags.  I recommend getting 1 lb per person.  The culling process is simple, make sure they are closed tight.  If they are gaping, tap them on the counter to see if they close.  If they don't, set them aside.  I'll also say wait till you're ready to cook them before you cull them so you can clean them at the same time.  To clean them, rinse off any loose sand or barnacles and remove the beards.  The beards look like wiry tangles sticking out of the shell.  Just grab it and pull.  Once you have culled and cleaned all your mussels give them a final rinse.
Mussels cleaned and ready to steam
 As for the wine, use one that you would like to drink.  As a matter of fact, a glass of the same wine you cook them with is a nice accompaniment.  Remember, don't think you have to look for a certain price point on a bottle of wine to get a good one.  A really good wine can be had for $10 - $12.  If you are not familiar with white wines, go to a store that has a Sommelier or at least a store that wine is their business.  Let them know what you are wanting the wine for and your price range and they'll be able to point you to some good choices.

A good white wine for mussels
You will also need some fresh herbs for your bouquet garni.  There are specific herbs and amounts to use if you want a traditional French bouquet garni but you can use what you want in your own cooking.  A bouquet garni is nothing more than a bundle of fresh herbs to provide flavor and aroma that is removed prior to serving.  The simplest way to make it is to put your herbs together and tie the bundle with two pieces of cotton kitchen twine.  Make sure you use 100% cotton twine.
Thyme, Sage, Rosemary, Basil
Mussels in White Wine


Mussels, cleaned, 1 - 1.5 lbs per person
4 - 6 cloves garlic, finely minced
2 - 3 Tbs olive oil
bouquet garni
     Sage
     Basil
     Thyme
     Rosemary
White Wine, 1/2 bottle


Put olive oil and garlic in a large skillet and turn on medium heat.  Cook garlic until it starts smelling good.  Add the bouquet garni and heat it, turning it so all sides are in the heat.  Pour in the half bottle of wine and increase heat to med-high.  Once the wine starts to simmer, add the mussels and cover the skillet.  Let the mussels steam for 2 minutes then remove lid and stir the mussels around and replace lid.  Let them steam another 2 minutes or until all the mussels are open.  Spoon the mussels into wide bowls and divide the broth between them.  Serve with hot crusty bread.


Freshly steamed mussels ready to serve
I've also done them adding a minced shallot along with the garlic.  Looking at recipes online a lot of chef types like to add lots of things to the pan.  My method lets the mussels and wine combine so they are the stars.  After all, why add chicken broth or red pepper flakes, as they'll change or over power the flavor of the mussels.  I think chefs sometimes let their training get out of hand and they try to do too much.  Sometimes they need to remember a classic is a classic for a reason and not every dish needs a new flair.


A wonderful supper
The bread I usually make is a variation on this recipe, Skillet Bread.  I alter the final process and make French bread loaves.  The changes are after proofing and bake time.  After proofing divide the dough in half and roll into long loaves.  Use the same time for the second proofing.  Bake at the same temp but only for 25 - 30 minutes.This bread also reheats well if you happen to have any left.


Nothing here is new or innovative when it comes to mussels but I do believe that the simplicity of this recipe is what makes the dish worth it.  Sometimes doing less is more.


If you've not tried mussels before then this is a good dish to start with.  It comes together quickly and it gets you involved with your meal by having to hold the shell while you get the meat out.  Give this a try and let me know what you think.


Uncle T

Tuesday, January 12, 2016

Spicy Seafood Stew

One of the benefits of living in coastal Virginia is the availability of a wide array of fresh seafood.  Plus, if a particular seafood isn't available locally we are close enough to get it shipped fresh and still maintain a high quality.  This brings us to mussels.


The good wife and I got introduced to mussels while stationed in Germany.  After all, they weren't very common in Tennessee when we were growing up.  Once we got back to the states we found that we'd have to get fresh mussels and prepare them ourselves if we wanted them since their use is not common in most American restaurants.  That said, when we find mussels for a good price we snatch them up and indulge ourselves.


Normally, we do mussels in a white wine sauce with some good crusty bread.  However, the good price we found was for a 10 lb bag so I get to play around more.  Since it is getting cold soups and stews feature prominently in our menu so it was only natural to use the mussels in a soup or stew.  I looked around at various recipes and thought about what else I had available and came up with this recipe.


Harvest tag indicating where the mussels were harvested
Be sure to clean the mussels before you put them in the stew.  Cleaning mussels is fairly simple, make sure there is no loose sand on the shell and pull off the beards.  Also at this time discard any that are gaping open and won't close when handled.

2 lbs of mussels, cleaned and ready for the pot
1 lb each of cod and shrimp, ready for the pot
Spicy Seafood Stew


1 lb hot Italian sausage
1 lb cod or other firm white fish
1 lb shrimp, peeled and deveined, tails removed optional
2 lbs mussels
1 large onion, finely diced
4 cloves garlic, finely diced
2 Tbs tomato paste
1 15 oz can diced tomatoes, drained
1 cup dry white wine
6 cups fish broth
6 cups chicken broth, optional
3 Tbs fish sauce, optional


Brown sausage in a deep pot and break it up to desired size.  If you get sausage in casings remove the casings.  Remove the browned sausage from the pot.  Put the onion and garlic in the sausage grease and sauté until translucent.  Add the tomato paste and stir together.  Cook until the tomato paste has darkened a bit then add the diced tomatoes.  Cook until the tomatoes start to simmer then add the wine and fish broth.  Bring to a simmer.  If you don't have or can't find fish broth you can use chicken broth and the fish sauce to make a substitute.  Once the liquid is simmering return the sausage to the pot.  Stir to mix and return to a simmer.  Add the cod, cut into 1 inch pieces, and cook for 1 - 2 minutes.  Add the mussels and gently stir and cook for 1 - 2 minutes.  Add the shrimp and gently stir then cook until the shrimp are done.  The shrimp should be done in about 3 minutes.  Ladle into a bowl and serve with crusty bread.  This makes 4 - 6 servings.


A nice bowl of spicy seafood stew
This stew ends up being nicely spiced but not so much that the seafood is over shadowed.  The broth is excellent sopped up with the bread.  I think an excellent substitution would be using Spanish chorizo in place of the hot Italian sausage.  You would just need to add some olive oil to the pot so you'd be able to sauté the onions.


The next time you're wanting a good stew then give this one a try.  Too many stores have decent fish markets now not to try it.  If you do try it let me know how it turns out.


Uncle T