Showing posts with label Pressure Cooker. Show all posts

Wednesday, January 16, 2019

Chicken and Spinach with Noodles Soup

It's a matter of fact in the South that when you are sick you eat chicken soup.  Usually it's a basic chicken noodle soup but sometimes it's a little different.  The past couple of weeks the good wife and I have been trying to fight off some bug that's going around.  Being a large semidomesticated animal I ended up with just a sinus infection and a cough.  The good wife got hit a bit harder.  When she gets sick I cook according to how she's feeling.

A few days ago I'd asked her what she wanted for supper and she said chicken soup, with spinach.  Naturally I made it happen.  It was tasty and easy to bring together.

I used my pressure cooker but the same thing can be done with a stock pot and more time.  The recipe will be written as I did it in the pressure cooker so adjust as necessary.

Chicken and Spinach with Noodles Soup

4 chicken leg quarters
1 box chicken broth
4 oz spaghetti noodles
2 cups spinach, rough chopped
salt
pepper

Place the leg quarters in the pressure cooker with a little water and cook under pressure for 20 - 25 minutes.  The meat should easily pull from the bones.  Pull the meat from the bones and roughly chop and return to the pressure cooker.  Add the box of chicken broth and stir.  Break the spaghetti noodles in half and add to the pressure cooker.  Pressure cook the chicken and noodles for 8 minutes.  Stir in the roughly chopped spinach until it is wilted.  Add salt and pepper to taste.  This will serve 4.
A fresh pot of soup ready to go
Once the timer goes off on the pressure cooking for the chicken you can let it naturally release pressure or you can manually release.  When it finishes after adding the spaghetti manually release the pressure.  When manually releasing pressure follow the manufacturer's guidelines and be safe about it.

We had cornbread leftover so some of it was reheated to accompany the soup.  They went very well together.
A filling and healing supper
Alternate methods to achieve this are varied.  One would be simmering a whole chicken until falling off the bone tender and using the resulting broth for the soup.  Another would be shredding a rotisserie chicken from the store.  Homemade broth is always best but a good quality boxed broth is good as well.

Whether you're feeling poorly or just want soup because it's cold, give this one a try and let me know what you think.

Uncle T

Wednesday, July 25, 2018

Sous Vide Pork Belly, Tri-color Quinoa with Tomatoes, and Boiled Okra

It's been some time since I've used and written about my Joule.  I'd been wanting to try their recipe for pork belly but every time I'd get one I'd cure the whole thing for bacon.  Last week I had stopped at the Commissary to get some cokes (generic Southern word for carbonated beverages) and saw they had a nice 3lb piece of pork belly in the meat case.  I decided that would be a half for sous vide and the other half for smoking.

Some weeks ago, ChefSteps came out with a combination offer of the big mouth clamp for Joule, a silicon pot cover, and a silicon mat to protect your counter from the heat.  This put those to the test and they did what they were supposed to do.  For long cooks I like to use a small cooler to help retain heat and that is exactly why the big mouth clamp was developed.  It worked like a charm with enough room left to have fit an even thicker cooler.  The silicon pot cover kept the water from evaporating and kept the heat in very well.  I'm quite pleased with them both.  I didn't bother with the mat since I was using the cooler.
Fresh from under the broiler
One thing I will change the next time I make this is the amount of the "cure" I will use.  In the ingredient list they say 5 heaping spoonfuls of salt and 2 heaping spoonfuls of sugar.  When they get into the process, they say 5 parts salt and 2 parts sugar.  I went with what was in the ingredient list and used it all for my 1.5lb piece of pork belly.  There was lots of extra "cure" that fell off and gathered in the corners of the vacuum bag.  While the belly had good flavor it was a bit saltier than I thought proper.
Succulent pork belly slices
I did do one variation to their instructions.  I ground 2 tablespoons of Szechuan peppercorns and added them to the "cure" mix before applying it to the belly.  Another thing I did, though not really a variation since they didn't address it was to put some roasted sesame oil in the bottom of my cast iron skillet.  The cast iron skillet is used to put the sous vide pork belly under the broiler to crisp the skin before serving.
A tasty supper
The tri-color quinoa with tomatoes was done in the pressure cooker.  I used chicken broth instead of water then stirred in some diced tomatoes along with some salt and pepper when it was done.  Adding some fresh sage, oregano, and thyme along with the tomato would be good as well.

Preparing the boiled okra can be found in this post.

We really like pork belly and this method of preparation will definitely find its way into the rotation.  If you have a Joule, give this pork belly recipe a go.  Pair it with the quinoa and okra and I think you'll be pleased with the results.

Let me know what you think.

Uncle T

Saturday, December 24, 2016

Sprouted Rice and Quinoa Mushroom Soup

Soup is one of the things that the good wife could eat at any time.  So if I was ever at a loss for ideas of what to fix for supper I could always make a soup and she'd be happy.  Once the weather turns cooler I like to add more soups to the nightly meals.  Of course, the way we do it soup is the meal rather than a warm up for the main meal.  Using the pressure cooker helps speed things up when making soup, especially when incorporating dried beans.


We eat mushrooms frequently.  So much so that I've contemplated setting up a system to grow our own.  Sometime ago I was looking at recipe suggestions I'd gotten via email and came across a Wild Rice Mushroom Soup recipe.  That sounded like an excellent use of mushrooms so I started researching.  In the end I combined parts of several recipes and did my own thing.
A pot full of mushroom goodness

This recipe can be changed to suit your tastes and dietary preferences.  I added some diced Kassler, a German ham, since I wanted meat with it and used chicken broth for the liquid.  Leaving out the ham and using a vegetable broth would make this a good vegetarian soup.  You could also change the types of mushrooms used to change the flavor profile as well.  Another change for the vegetarians would be to substitute soy or almond milk for the heavy cream.  See, it doesn't take many changes to have a completely different soup.


Sprouted Rice and Quinoa Mushroom Soup


2 cups sprouted rice and quinoa
1 box + 1 cup chicken broth
1 lb baby bella mushrooms, chopped with stems removed
1 oz dried shiitake mushrooms
1 leek, halved and thinly sliced
2 -3 Tbs butter
3 - 6 cloves garlic, minced
1/2 Tbs tomato powder or tomato paste
1 cup dry/semi-dry white wine
1/2 cup heavy cream
1 Tbs soy sauce
2 Tbs flour
olive oil
fresh ground pepper
salt
8 - 10 oz ham, diced (optional)

If using an electric pressure cooker, put the two cups, using the rice measuring cup that came with the pressure cooker, of sprouted rice and quinoa in the pot and add the box of  chicken broth.  Set the timer for 10 - 12 minutes.  If using a regular pot, cook time will be according to package instructions using 1.5 cups of the sprouted rice and quinoa.  Place the shiitake mushrooms in a 2 cup measuring cup and cover with 1.5 cups of boiling water.  Once they are soft, pull the shiitakes out and dice them and reserve the water they were soaked in.   In a large skillet, melt the butter with the olive oil.  When hot, add the garlic, leek, chopped baby bella mushrooms, and tomato paste.  Once the mushrooms have released their liquid, add the chopped shiitake mushrooms.  Sprinkle the flour over everything and cook until the flour starts to brown and stick to the skillet.  Add the wine, 1 cup broth, reserved shiitake soaking liquid and stir until thickened.  Add the contents of the skillet to the pot with the sprouted rice and quinoa in broth and stir to combine.  Stir in the heavy cream and soy sauce then add salt and pepper to taste.  Let simmer for 30 minutes for all flavors to combine.  Optional, once the sprouted rice and quinoa are cooked, add the diced ham to the broth to heat or lightly brown it in a skillet before adding it.  Serves 4 - 6 people.
A nice bowl of Sprouted Rice and Quinoa Mushroom Soup
This soup is rich and thick with wonderful umami from the mushrooms.  The addition of the ham ups the flavor and satisfies those like Uncle T that think you have to have some meat with supper.  Best of all, using the pressure cooker it is quick to make.

Give this soup a try some cold evening and I think you'll be pleased.

Uncle T

Tuesday, November 1, 2016

Red Rice and Shrimp with Boiled Okra

Rice has been a staple in the South for a long time.  It is more prevalent in the Low Country cuisine of the Carolinas and in the Cajun and Creole cuisine of Louisiana.  Still, I remember eating rice while growing up in Tennessee.  Between the presence of rice in Southern cooking and in the Korean and Thai cooking we enjoy, the good wife and I eat a fair bit of rice.  Cooking rice in my pressure cooker makes it an easy choice for many meals.
Red Rice and Shrimp with Boiled Okra
I'm not sure where or when I first saw anything about red rice.  It's not something we ate growing up.  I've been trying to come up with ways to use more of our canned tomatoes and this came to mind.  Plus shrimp and rice are an excellent combination so it just went from there.


Even though our okra is anywhere from almost upright to almost parallel to the ground after the edge of hurricane Matthew hit us, it is still producing.  Since the good wife prefers boiled okra and we had plenty of the smaller pods it was a match made in heaven.  Making good non-slimy boiled okra is detailed in this post, Boiled Okra.  The only change was that I added some of my Cajun style seasoning to the butter instead of using hot peppers.


Red Rice and Shrimp


1.5 cups rice
1 red onion
1 red bell pepper
1 28 oz can tomatoes
1.5 tsp Tarragon
1.5 tsp Oregano
1.5 lbs shrimp, 31-35
6 Tbs butter
Cajun seasoning
salt


Cook the rice according to the method you use.  I used the pressure cooker set for 7 minutes.  Divide the red onion into quarters and slice.  Julienne the bell pepper to strips about the same length as the red onion slices.  Melt 2 Tbs butter in a skillet and add both the red onion and bell pepper and sprinkle with a bit of salt.  Sautee' until they are tender.  When the rice is done, add the red onion and bell pepper to it and stir.  Drain the tomatoes, reserving the liquid, and add to the rice.  Break up the tomatoes and stir into the rice mixture.  Add the Tarragon and Oregano and stir.  Season the rice mixture to taste with the Cajun seasoning.  Add the reserved tomato juice until you get the consistency you want.  Keep warm and let the flavors meld.  Season the shrimp with the Cajun seasoning.  Melt the remaining 4 Tbs butter in a skillet and add the shrimp.  Cook until done and add to the rice mixture.  Stir to combine.  Serve with boiled okra and enjoy.  Serves 4.
A colorful and tasty meal
The shrimp can be left tail on if you like the look of for presentation purposes.  I pinch the tails off because I'd rather not have to fool with it while I'm eating.  If you take the tails off, keep them in the freezer until you have enough to make some good shrimp broth for making seafood soups.  I prefer 31-35 size shrimp because they are small enough to eat with one bite and not have your mouth too full and can be cut in half to eat with some of the rice.


I believe that chicken cut into bite size pieces and given the same treatment as the shrimp would work for folks that are allergic to shellfish.  I'll have to give that a try sometime.


There are many Cajun style seasonings available.  I was given some called "Slap Ya Momma" several years ago and we like it.  Since that can ran out, I've devised my own version of it to avoid having to order it since I've not seen it in stores in Virginia.  If you don't have a preferred seasoning look this one up and order it.


If the tomatoes don't have enough juice to get the consistency you want, add a bit of water or even white wine.  For the first meal, the home canned tomatoes had enough juice to get the consistency I wanted and enough left over for the good wife to drink the next day.  When I reheated the leftovers I used some left over white wine for some additional liquid.  It did add something more to it than water would have.


See, another fairly quick meal that packs a punch of flavor.  Give it a try and let me know what you think.


Uncle T

Monday, October 17, 2016

Spaetzle and Sauerkraut Soup

What a way to combine some of our favorite things.  This came about because of a statement by the good wife.  After finding a container of leftover spaetzle in the refrigerator while putting up leftover spaetzle from supper she told me to make soup to use it up.  Her wish is my command.


I've been trying to use more of our fermented food as part of meals or in recipes.  Yes, I know cooking with them kills the probiotics but sometimes it's about the flavor.  Besides, the improved nutritional benefit is still there and that is good enough.  Since the weather is cooling and since sauerkraut and spaetzle go together well it seemed natural.


I started searching for recipes for soups containing these and couldn't find any with them together.  The spaetzle soups tended be chicken with spaetzle and the occasional recipe with pork or mushrooms.  All the sauerkraut soup recipes had either white beans, potatoes, or both along with a meat that was usually sausage.  So, as frequently happens, I went my own way and started planning.


In the end, this tasty soup ended up containing homemade spaetzle, home fermented sauerkraut, homemade pork broth, and homemade mettwurst.   I chose the mettwurst because it is a good spicy sausage that pairs well with sauerkraut on the plate and I figured it would do the same in the soup.  The soup was made in the electric pressure cooker using a combination of different settings.
A full pot of soup.  The pressure cooker has a 6 quart capacity.
OK, I know most people won't go to the extent of growing cabbage and making their own sauerkraut.  That's OK.  I would suggest buying kraut that comes in a bag in the cooler section of the store rather than the canned variety.  The bagged kraut has much better flavor and crunch


Spaetzle and Sauerkraut Soup


1 lb smoked sausage (mettwurst, kielbasa, etc)
3 - 4 cups cooked spaetzle
1.5 - 2 lbs sauerkraut, drained
1 cup diced carrots
2 cups diced potatoes
6 cups broth
1/2 - 1 Tbs salt*
1 tsp ground turmeric
1/2 Tbs garlic powder


Put the broth in a large pot and bring to a simmer.  Add the diced carrots and potatoes along with the spices and cook until tender.  I set the pressure cooker for 5 minutes.  Once they are tender, stir in the spaetzle and sauerkraut and let them get warm.  Slice the smoked sausage into 3/8 inch/1 cm pieces and add to the soup and stir.  Let the whole pot simmer for 30 minutes for the flavors to come together.  Serve with a good crusty bread.  Makes 6 servings.


*This will be variable depending on your broth.  My homemade broth didn't have any salt so both it and the potatoes need the salt.  Commercially produced broth has varying levels of salt so adjust to taste.  Don't forget the kraut will have some salt as well.
A bowl of filling tasty goodness
As with many soups and stews it was better the 2nd night and will probably be even better on the 3rd night.  This is a filling nutritious soups perfect for cooler weather.


If you make this soup let me know what you think.


Uncle T

Friday, October 14, 2016

A Different Sunday Dinner

Growing up, Sunday dinner tended to be predictable.  Momma would wrap a beef chuck roast in aluminum foil with some potatoes and carrots and put them in the oven just before we headed out the door to go to church.  After we got home, we ate roast, potatoes, and carrots to the enjoyment of all.  Every once in a while the menu would change but to the best of my recollection, this was the standard.


These days, the good wife and I usually just eat leftovers from Saturday's supper as our lunch on Sunday.  Some times I'll go ahead and cook something but that is usually because we have something we don't want to chance going bad by waiting another day or two.  This most recent Sunday, I cooked for that very reason.


Exotic fruits are some of the few food items we actually go to the store to get.  After all, most of them won't grow in Virginia.  A few days ago we bought some plantains because they had some good looking ones and the price was right.  I don't do the green plantain double frying thing.  I prefer to use one that is almost completely ripe.  Add a little salt after they are done to play against their sweetness and it is an excellent side dish.
Minimum ripeness of plantain I use
Fried Plantain


1 - 2 plantains, almost fully ripe
oil
salt


Cut the plantains in half then cut the two halves down the middle.  Remove the skin.  Lay each half on a cutting board and carefully cut into two slices of equal thicknesses.  Heat oil in a skillet and place the plantain slices in a single layer.  Fry until golden brown then turn them over.  Once the second side is done, remove them from the skillet and drain on a rack or paper towels.  Repeat the process if need be.  Sprinkle a little salt on the plantain slices and serve.


Along with the plantains, I grilled some pork chops and made some black beans in the pressure cooker. 


The pork chops were seasoned with salt, pepper, and ground roasted cumin then a little splash of Tequila for additional flavoring was added.  The pork chops were then grilled to 145F which is medium rare and leaves them tender, juicy, and with just a faint hint of pink inside.  I thought about making a pineapple salsa to top them with but decided that would be gilding the lily.  The flavor was so good I'll definitely be using this seasoning combination again.


The black beans turned out very well.  As usual, I used my Simply Ming electric pressure cooker.


Pressure Cooker Black Beans


1 cup dry black beans
3 cups chicken broth
2/3 cup salsa
3 oz fat back or bacon ends and pieces
2 - 3 tsp salt
1 1/2 tsp pepper
1 tsp ground roasted cumin
1/2 tsp cayenne
2 - 3 bay leaves


Add all ingredients to the pressure cooker and stir to mix well.  Put on lid and turn valve so it will build pressure.  Select pressure cook and set timer for 50 minutes.  At the end of the time, allow pressure to naturally release.  If the liquid isn't thick enough for your liking, mix a little corn starch and water and add to the beans and stir.  Raise the heat for10 minutes then turn back to warm.  Stir and the broth should be thicker.
Fried Plantain, Black Beans, and grilled Pork Chop
As you can see, not a typical Sunday dinner for a good Southern boy at all.  One of the benefits of an Army career is traveling and being introduced to other food cultures.  Try those foods when you get the chance.  If you like them, make them yourself.  If you can't find the right ingredient use one that is close that you do have.  Some of those subtle changes yield excellent results.


Give these a try either together or as parts of different meals.  I think you'll enjoy them.  Let me know how they turn out.


Uncle T

Tuesday, July 5, 2016

Mediterranean Sprouted Rice and Quinoa with Sheep Sausage

I know I've mentioned how much I enjoy my pressure cooker.  Well, I really enjoyed it again the other night.  I was thinking about what to make for supper using what was on hand and without having to get overly complicated.  I wanted to use the sprouted rice and quinoa and finding the Thessaly sausage in the freezer provided the inspiration.


Thessaly sausage is a lamb sausage from Greece as I understand it, though I have found sites through Google claiming Thessaly sausage is beef.  Since more say it is lamb I'm going with lamb.  That said, mine was made with sheep, Rainbow the Ram to be exact.  Yes, once again I'm using homemade sausage.  I know there's not a lot of difference but there is a flavor difference between lamb and grown sheep.  Since the determination between the two is age I figure I'm still following the intent of the sausage. 
Mediterranean Sprouted Rice and Quinoa with Thessaly Sausage
The sprouted rice and quinoa were cooked using the same method I'd use for brown rice in the pressure cooker.  The rest of the ingredients were stirred in at the end.  This ended up being a simple yet tasty and filling meal.  The two cups in the recipe refers to the rice measuring cup that came with the pressure cooker. 


Mediterranean Sprouted Rice and Quinoa


2 cups Sprouted Rice and Quinoa, 1.5 cups if cooking on the stove top
3 cloves garlic, minced
2 Tbs olive oil
1 15 oz can diced tomatoes
6 oz crumbled Feta cheese
1 Tbs minced Basil
1 Tbs minced Oregano
1 Tbs minced Thyme
1 Tbs minced Marjoram
2 Tbs minced Italian Parsley
salt
pepper


Put sprouted rice and quinoa mixture into the pressure cook and add liquid to the 2 cup line.  Add olive oil and garlic to the pressure cooker.  Stir to mix garlic in well.  Put on lid and set for pressure cooking for 7 minutes.  Once the timer goes off, allow the pressure to release naturally.  Remove the lid and stir to fluff.  Add the diced tomatoes, Feta cheese, and herbs and stir to combine.  Add salt and pepper to taste.  Serve with grilled meat and enjoy.  Serves 4 - 6.


For a bit of extra flavor you can use broth instead of water to cook the sprouted rice and quinoa.  I used some venison broth I had in the freezer.
Left over Mediterranean Sprouted Rice and Quinoa with Mergez Sausage
We had the leftovers for supper a couple of nights later and the Mediterranean Sprouted Rice and Quinoa reheated well in the microwave.  I added a 2 Tbs of water to it to help steam it and fluffed it halfway through.  Since we'd eaten our last package of Thessaly sausage I grilled some Mergez sausage to go with it.  Mergez is a spicy lamb sausage from North Africa.  Again, this was made with Rainbow the Ram.  I think we like the pairing with the Mergez slightly better.  I think that grilled meat skewers, especially lamb/sheep, seasoned in a Mediterranean style would go well with it also.


Since flatbreads are eaten with meals in many countries around the Mediterranean I was wanting a flat bread with out meal.  Sadly, I didn't think about it in time to try out one of several pita recipes I'm wanting to try.  I ended up heating up some flour tortillas to use for the flat bread. 


I hope you give this recipe a try.  The sprouted rice and quinoa both are tasty and good for you so it is a winning combination.  If you try it let me know what you think.


Uncle T

Sunday, May 1, 2016

Sprouted Rice and Quinoa with Seafood in a White Wine Butter Sauce

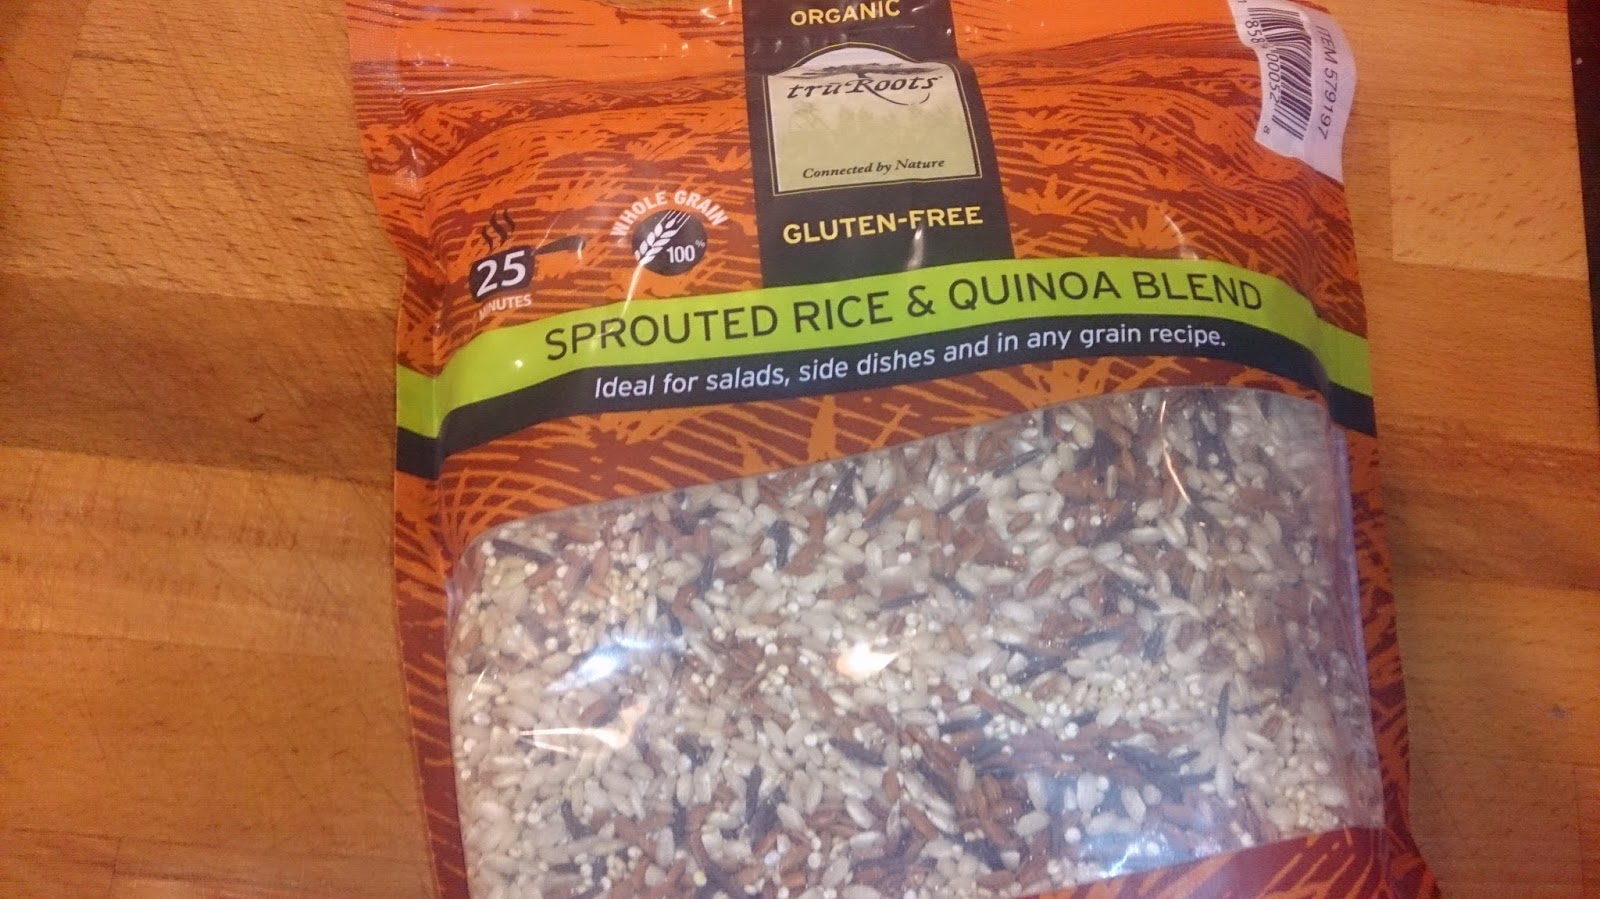
We were doing our grocery shopping this weekend and one of the stops was at BJs.  BJs is a warehouse store similar to Costco and Sam's Club.  One of the things on our list was rice so we checked to see if they had what we were wanting in a manageable size container.  As I turned into that aisle a package caught my eye.  I took a quick look then went further down to look at the rice.  As I returned I stopped to look a bit more closely at the package.  The reason it caught my eye was that it was Quinoa and Sprouted Rice.

Now, we've tried Quinoa since it was the Grain de Jour but weren't sufficiently impressed to continue paying for it.  I've been reading about the changes in both flavor and nutrition in sprouted grains but had not seen any for sale and hadn't tried sprouting my own.  The combo of the two intrigued me so we took a chance and bought the 3 lb bag.  What we got was made by Tru Roots.  If you are not near a store that carries it you can get it here, http://www.amazon.com/truRoots-Organic-Sprouted-Quinoa-Blend/dp/B008KAILNK.

Our next stop was at our favorite international market, Grand Mart, in search of dried mushrooms for a project I have in mind.  I know I've mentioned this store before.  They carry predominantly Asian products and have an excellent fish market.  As we came through the door, my good wife pointed out a sign advertising a sale on squid.  Needless to say, we both got excited.

We ended up getting some squid to use for our Sunday dinner and a nice octopus for supper on Monday.  Yep, expect that post to follow shortly.

Cleaned Squid ready to skin and cut up
I still hadn't decided what I was going to do with the squid until we got home from church Sunday morning.  I had two choices which were pasta with the squid or use the sprouted rice and quinoa blend.  When presented the choice, the good wife chose the sprouted rice and quinoa blend.  After that it was time to get busy.

I cooked the sprouted rice and quinoa in the pressure cooker.  I set it for 7 minutes rather than the 6 minutes for regular rice and let it lose pressure naturally while everything else cooked.  The only extra added to this was the olive oil I used to keep it from foaming.  Once it was done the sprouted rice and quinoa had a nice texture and good flavor.  The texture was slightly chewier than al dente pasta, just enough to know you had something substantial without being tiresome.  The flavor was lightly toasted and quite enjoyable.
A bowl of Sprouted Rice and Quinoa ready for the Seafood and Sauce
So without further ado, let's get into the recipe.

Sprouted Rice and Quinoa with Seafood in a White Wine Butter Sauce

Sprouted Rice and Quinoa
Water
1 lb peeled deveined shrimp, tails removed
1 lb fresh squid, cut in 1/4 inch rings
8 oz baby bella mushrooms, sliced
1 stick butter
1/3 cup Parmesan cheese, grated
1 cup white wine
3 cloves garlic, minced
salt
pepper
fresh herbs, minced (basil, thyme, oregano, sage)

Cook sprouted rice and quinoa according to package directions.  If using an electric pressure cooker, use two cups of the sprouted rice and quinoa and water to the two cup line.  Set time for 7 minutes and allow to naturally release the pressure when the time is done.

While the rice and quinoa is cooking start the seafood and wine sauce.  Melt 1/2 stick of butter in a large skillet.  When it starts to bubble, add the mushrooms and cook until they get some color.  Once the mushrooms are done, add the shrimp and the rest of the butter.  Season the shrimp with salt, pepper, and garlic.  When the shrimp is half done add the squid and the fresh herbs.  After a minute of the squid cooking add the white wine.  Once the white wine is at a simmer add the Parmesan cheese and stir to mix.  Continue to simmer until reduced by half stirring frequently.
Shrimp, Squid, and Mushrooms in a White Wine and Butter Sauce
Once the white wine and butter sauce is reduced remove from heat.  Divide the sprouted rice and quinoa between 4 pasta bowls.  Spread the seafood and mushrooms around the mounds of sprouted rice and quinoa then pour the sauce over the grain mixture.  Garnish with minced parsley and serve.

A tasty filling lunch
Squid is one of those things that need to be cooked fast at a high temperature or a long time at a low temperature.  Simmering the sauce covers the long and low technique.  This gets the squid cooked without being overly chewy.

The good wife has enjoyed most everything I've come up with but this one seemed to make a serious impression.  She actually said this meal was restaurant worthy and was the sort of thing that people would pay serious money on.  Rare praise indeed.

Whether you use this recipe or not I think you should give the sprouted rice and quinoa a try.  It can be used in place of rice in most any dish and as the base for a healthy salad.  Eat it for the flavor and texture if not for the nutrition.  Give both the sprouted rice quinoa mixture and this recipe a try and I think you'll enjoy it.  If you do, let me know what you think.

Uncle T

Thursday, January 28, 2016

Canary Bean and Mussel Soup


A few days ago I wrote about getting mussels in a 10 lb bag in the post about Spicy Seafood Stew.  After I made that stew I still had 5 lbs of mussels in the refrigerator.  Being a frugal sort, I decided to go ahead and steam the remaining mussels in a pot with more white wine lest any go bad while I was deciding how to use them.  They were steamed using the method discussed here, Mussels in White Wine


After the mussels were steamed, I picked the meat from the shells and stored them in the wine broth for later use.  The wine and mussel liquor came to a little over 2 cups.


As for using the canary beans, I found them at our favorite ethnic grocery store, Grand Mart.  I was on the side of the store that is primarily foods from Hispanic regions and saw a good selection of dried beans.  Since the pressure cooker makes quick work of dried beans, I decided to see if there were some we hadn't tried before.  That's how I came to have canary beans at the house.


Of course with cold weather soup seemed to be a natural choice.  Having the primary ingredients on hand it was just a matter of deciding on additions to help flavor the soup.  This soup is the result.


Canary Bean and Mussel Soup


1 1/2 cup dried canary beans
meat from 5 lbs of mussels, steamed
4 - 6 oz bacon, diced
1 medium onion, finely minced
2 cups white wine broth from steaming mussels
2 cups water
2 - 3 bay leaves


Put dried beans in pressure cooker with the diced bacon and minced onion.  Pour in the white wine broth and water and stir.  Add the bay leaves and stir.  Put the lid on the pressure cooker and set timer to cook 40 minutes under pressure.  Allow pressure to naturally release.  Stir in mussels and let set until the mussels come up to the temperature of the soup.  Taste broth and add salt and pepper if desired.  Serve with hot crusty bread.  Makes 4 servings.


Canary bean and mussel soup
Cooking the canary beans with the pressure cooker for 40 minutes left them with a firm texture.  Next time I may add a few minutes to get the beans a bit softer.  They weren't under done they were just a bit firmer than we usually eat.  They were a nice contrast to the soft texture of the mussels.


If you don't have a pressure cooker then soak the beans over night and make the soup in a slow cooker.


For the bread I used the same recipe referenced in the link above with the same changes.  The changes are after proofing and bake time.  After proofing divide the dough in half and roll into long loaves.  Use the same time for the second proofing.  Bake at the same temp but only for 25 - 30 minutes.


We finished this soup last night.  It reheated well and as usual the flavors melded to make the soup better the second time.  A slow reheat also kept the mussels from getting tough.


Give this soup a try as a way to get more beans into your diet, not to mention an excellent use for mussels.  I think you'll like this soup.  If you fix it, let me know how you liked it.


Uncle T


Monday, January 4, 2016

Red Beans with Kohlrabi Greens and Roasted Kohlrabi

Kohlrabi is not normally on a Southern boy's menu.  We tried some in our early Fall garden and liked it so I put out 8 plants for the late Fall garden.  Two of them were ready to harvest the other day and since there is nothing quite as good as eating something straight from the garden we had them for supper.


Kohlrabi is related to cabbage and as such the leaves can be eaten as well as the bulb.  I wanted to use the greens as well as the bulb for supper.  I also wanted to try something different with the kohlrabi than I did earlier in the year.  Previously I'd made fritters and a slaw with the kohlrabi so I figured roasted was the next thing to try. 


The greens I wanted to cook and I was wanting to cook some more dried beans in the pressure cooker so the red beans and kohlrabi greens came to mind.  I will have to say that this dish turned out to be very good.


Red Beans with Kohlrabi Greens


1 cup dried small red beans
Greens from two kohlrabi, stems removed
4 oz bacon, slab is best
1 medium onion, diced
1 cup chicken broth
3 cups water
1 tsp roasted ground cumin
2 tsp salt
1 tsp pepper


Dice bacon in 1/4 inch cuts.  If using sliced bacon cut in 1/2 inch pieces.  Put in pressure cooker and start to brown.  Add diced onion and cook until it starts to turn translucent.  Turn off heat.  Add everything else except the kohlrabi greens.  Set pressure cooker to 20 minutes.  Once the timer goes off release the steam.  Taste the broth and adjust seasoning if needed.  Stir in the kohlrabi greens and set the pressure cooker to 10 minutes.  Release the pressure once the timer goes off.  Serve in a bowl to get the good broth.


I used some ends and pieces of bacon from the last batch of bacon I smoked and sliced.  I only used 1 cup of chicken broth because that is what I had in the refrigerator.  I think using the broth gave a greater depth of flavor over using just water for the beans.


Roasted Kohlrabi


1  kohlrabi per person
olive oil
salt
pepper


Peel the kohlrabi and cut into 1/2 inch cubes.  Put the cubes in a bowl and drizzle with olive oil, salt, and pepper.  Toss to coat.  Dump kohlrabi onto baking sheet and put in a 400F oven for 20 minutes.  Remove from oven and toss then return to oven for 10 more minutes.


A most excellent supper
We had butter fried pork chops with a pan sauce since I'd processed a pork loin the day before.  The pork chops are super easy.  Let the pork chops come to room temperature.  Season with salt and pepper while they warm.   Melt 2 - 3 Tbs butter in a skillet.  Once the butter starts to bubble add the pork chops.  Fry for about 4 minutes until browned on the bottom.  Turn the chops and fry for another 3 - 4 minutes.  Move pork chops to the plates.  To the pan drippings add 1 - 2 oz whiskey or brandy and allow alcohol to cook off.  Simmer until the sauce is reduced by half and spoon over the pork chops.


As you can see, we're really liking the pressure cooker.  I think it is a great investment for our kitchen.  I'll be posting more recipes from the pressure cooker for sure. 


Give these recipes a try sometime and I believe you'll enjoy them.  After you make them let me know what you think. 


Uncle T

Wednesday, December 23, 2015

Pressure Cooker Sausage and Kale Soup

Have I mentioned that I really like my electric pressure cooker?  While there are some things that a long slow cook is to be preferred, some meals are just as good when using this quick method.  Dried beans come to mind as something that is just as good when pressure cooked.  Soups turn out very well also.  To that end, I've been thinking about soups to try in the pressure cooker.


Sausage and Kale Soup ready to serve


I was searching soups recipes and came across a list of soups that had pasta and one of them was sausage and kale.  The picture looked good so I started looking at sausage and kale soup recipes.  Seems most of them call for potatoes rather than pasta but I wanted to include pasta.  That was as much for the pasta as it was the chance to cook pasta in the pressure cooker.  Another change from other recipes was the use of dried beans instead of opening a can or two.  I also noticed that most recipes called for sweet Italian sausage and the rest for some sort of smoked sausage.  I used some of my home made hot Italian sausage.


The soup was cooked in two sessions with the two sessions totaling only 25 minutes.  Making the meat balls was the longest bit of prep work for this meal.  I used my small portion scoop, a #70 scoop,  to make the meat balls a consistent size.  After the meat balls were made they were lightly browned using the sear function on the pressure cooker.  Nothing like only having one pot to clean up after supper.


 Sausage and Kale Soup (Changes listed after the instructions)


1 lb hot Italian sausage
8 oz Rigatoni
1.5 cups dried great northern beans
4 - 6 cups chopped Kale, stems removed
2 quarts chicken broth
2 Tbs Italian seasoning
2 tsp black pepper
2 tsp salt


Make meat balls out of the sausage, approximately 1/2 oz each.  Lightly brown in the pressure cooker.  Pour in the chicken broth, dried beans, and pasta.  Add the salt, pepper, and Italian seasoning and stir to mix.  Put the lid on, making sure the valve is set to pressure cook, and set timer for 15 minutes.  After timer goes off, release the steam.  Add the kale to the cooker and stir to fully incorporate.  Put lid back on and pressure cook for another 10 minutes.  When done, manually release steam again and serve.


A bowl full of goodness


Changes I'll make next time I make this include upping the amount of chicken broth to 3 quarts, waiting to put in the pasta, and just letting the hot soup wilt the kale rather than pressure cooking it.  It needs more chicken broth because I underestimated how much would be soaked up by the beans and pasta as they cooked.  I would do the meat, broth, and beans for 15 minutes, then add the pasta for the final 10 minutes.


Doing the dried beans this way yielded beans that were fully cooked but were still firm.  For something like this you don't want them cooked to mush like you would if you were just cooking a pot of white beans to eat with sausage and cornbread.


If you have the time to make it, some fresh hot crusty bread would go good with this soup.  It is not necessary though.

Wednesday, December 16, 2015

Simply Ming Pressure Cooker Review

For some time I'd been thinking about getting an electric pressure cooker.  After all, pressure cooking speeds the cooking process and that can be a good thing.  The hold up on getting one came down to a couple of things, one being that most didn't seem versatile enough and the second being I didn't like the controls being on the side.

We had gotten a new slow cooker and found we didn't like it because the sides got too hot.  Then, while channel surfing I saw Chef Ming on HSN.  I do like watching the chefs on the shopping networks for some reason and Chef Ming was talking about his electric pressure cooker so I decided to watch.  I called the good wife into the room to check it out.  In the end, I went online and ordered it from HSN.  It is no longer on HSN's web site but it can be found on Amazon.  My good wife's sister recently bought one through Amazon.


The Simply Ming Pressure Cooker has several functions and I've used them all.  Best of all, the control panel is at the bottom and faces up so it is easy to see and use.  You can use it as a pressure cooker, slow cooker, a steamer, keep food warm until ready to eat, and it has a sear function.  It comes with a measuring cup for rice and a rice scoop for after it is done.  When I placed the order it also came with 50 recipe cards.  While some of them sound good, many have ingredients that even I don't keep around and the preparation instructions are lacking in completeness and are not for the pressure cooker.


The pressure cooker function was the first one I tried.  I used it to make hot wings.  Our usual way of making them had been putting them in the oven to cook then toss them in my home made buffalo style sauce.  From frozen, it takes 45 minutes to cook the wings this way.  With the pressure cooker, they are done in 20 minutes once it gets to temperature.  The pressure does make them a bit soft, so I do a quick toss in flour and fry them then toss in the sauce.  I also end up with a cup or so of chicken broth that gets frozen for later use in soups.


18 frozen chicken wings ready to go.
The second use of the pressure cooker was for rice.  I had some sushi rice for making kimbop so I used that since Minute Rice was the only other rice we had on hand.  Now, I just buy any long grain rice.  To pressure cook rice, use the included measuring cup then add water to the line marked on the cooker that corresponds with the number of cups of rice you put in.  Rice is done with 6 minutes on the timer.

The next function tested was the slow cooker and delay setting.  To test that, I made my version of stuffed cabbage leaves in a tomato sauce.  That was written about here, Cabbage Rolls.  I made them up the evening before and set the pot in the refrigerator.  I put it in the cooker in the morning before I left for work and set the delay to start the cooking a little before I got home.  It was cooking merrily away when I got home and it finished when I expected.


Stuffed Cabbage ready to cook
The sear function was done in conjunction with another slow cooker meal.  I made venison rouladon for supper.  The rouladon were seared in batches then stacked in the pot and slow cooked.  Being able to sear in the pressure cooker meant one less thing to wash after supper.  That recipe was written about here, Venison Rouladen.

The only function that hasn't been used repeatedly is the steamer function.  The reason being that we don't steam vegetables very often.  Contrary to my Southern roots I don't cook my vegetables to death and we're not afraid of a bit oil or butter to help carry seasonings on the vegetables.  The pressure cooker comes with a small rack to keep what you are steaming above the liquid.

Another benefit of the pressure cooker has come in the form of broths.  I processed 8 bone in pork butts for sausage and as usual saved the shoulder blades to cook for broth.  I fit all 8 in the pressure cooker, added a coffee cup worth of water, then pressure cooked them for 40 minutes.  The bits of meat were soft and tasteless after that time so all the goodness had been squeezed out to make the broth.  The resulting broth was used to make Pork Belly Soup.  It was a far cry from the old way of covering the bones with water and slowly simmering to get the same effect then having to reduce the water to concentrate the flavor.


A quick word about clean up, it's fast and easy.  The non-stick coating is amazing.  We've not found anything that couldn't be cleaned up simply by wiping with a paper towel.  We still use soap and water to be safe but the inside is clean when we do it.


I am quite pleased with my Simply Ming Pressure Cooker and would recommend it for anyone that was looking to get an electric pressure cooker.  At 6 quarts capacity it can handle most anything you want to cook.

Uncle T