Wednesday, June 8, 2016

Mushroom Fettuccine with Miso Beef and Asparagus

Several years ago while we were stationed in Texas we would drive up to Wimberley for their Market Days.  The Wimberley Market Days was the 1st Saturday of the month and was a combination farmer's market, flea market, and arts and crafts show.  It took several hours to get through the whole thing even if you just took a quick glance at each booth.

One of the regular vendors would demo their pasta.  They had dry pastas of several flavors that they had developed.  Our favorites were the mushroom and the hot pepper.  I've not found any quite like them since we moved to Virginia.

I've tried different flavored pastas with mixed success.  My worst attempt was making black bean pasta.  The flavor was good but the texture was sadly lacking.  I've been researching alternative pastas and think I have a handle on some of the fixes.  I decided to test some of the changes on making the mushrooom pasta.

Most grocery stores have some small packages of dried mushrooms.  We went to Grand Mart, our favorite international market, and bought a large package of dried shitake mushrooms.  We also picked up a jar of miso at the same time.  I'd been thinking of the miso for soup but thought it would be an excellent seasoning.  I actually got Korean fermented soybean paste which is called Doenjang.  As I understand it, doenjang is a bit stronger flavored than miso.  I'm still calling it miso beef because more people are familiar with miso than the name doenjang.
Doenjang, fermented soybean paste


Mushroom Fettucinni

1/2 cup powdered mushrooms
1.5 cups flour
1 tsp salt
1 tsp olive oil
3 eggs plus 1 egg yolk

Put a handful of dried mushrooms in a food processor/Vitamix and reduce to powder.  Put 1/2 cup of the mushroom powder in a bowl.  Add the flour and salt and stir to combine.  Add the eggs, egg yolk, and olive oil and stir.  Once most of the ingredients are combined, turn out on a smooth surface and knead until smooth.  Wrap in plastic and let sit for 20 - 30 minutes.  Cut the pasta into 4 pieces and run through the pasta maker to flatten and thin.  Cut into desired lengths then run through the fettuccine cutter.  Spread on a tray with a bit of flour and repeat with the rest of the dough.  Add the fettuccine to heavily salted boiling water and cook until almost done.  This will just be a few minutes.  Add to the miso beef and asparagus and combine thoroughly.  The fettuccine will finish cooking during this mixing.
These are the dried Shitake mushrooms I used
Miso Beef and Asparagus

1 lb beef, I used strip steaks
1 lb asparagus
1/2 cup miso paste
2 Tbs olive oil

Cut beef into thin strips and put in a bowl.  Add the miso paste and mix thoroughly.  Let this stand for at least an hour.  Trim the asparagus then cut into thirds.  Heat olive oil in a skillet and add the asparagus and sprinkle with salt and pepper.  Once the asparagus has cooked for 1 - 2 minutes add the beef to the skillet.  Cook until the meat is almost done.  This should be timed to be around the same time the fettuccine is done.  The pasta water that transfers with the fettuccine will combine with the miso paste to make a nice sauce to coat the noodles.  Serve and enjoy.  This will make 4 good size servings.
Mushroom Fettuccine with Miso Steak and Asparagus
This is a mighty tasty meal that reheats well if you have leftovers.  This would also work well with pork or chicken.  Give these out of the ordinary ingredients a try.  Let me know what you think.


Uncle T

Tuesday, May 17, 2016

Sriracha Tater Tot Bombs

For the past few months I've been seeing Tater Tot Bombs popping up all over the internet.  Everybody that writes about them tells how their family raves about them.  Every single recipe I've seen has been the same.  Each one is tater tots, bacon, cheddar cheese, and brown sugar.  OK, given both my career and hobby I've been involved in the culinary world for 26 years I understand the whole sweet and savory combination.  However, I don't believe you need to make that combination with everything that comes along.
Everything in place ready to roll
I'll admit that the most likely reason I don't completely buy off on the sweet and savory thing is that we don't eat many sweet things.  Then again, I tend to do things my way in the kitchen and sometimes disregard the accepted culinary dogma.  Besides, as I've said before, a recipe is a suggestion or just a shopping list.
Rolled up and ready to cook/smoke
Most days around 1700, the good wife and I will get something cold to drink and sit on the patio and talk or just watch the dogs do what they do.  This is usually the time I'll finalize plans for supper as far as sides go.  Since the good wife was on the phone with her sister and we were going to have leftover pizza for supper, I decided to do a small batch as hors d'oeuvres.  It was to be a time for experimentation.
Sriracha Tater Tot Bombs hot from the oven
I had some Smithfield Hometown Original bacon on hand that I decided to use.  I also had a small piece of Colby Jack cheese that needed to be used up so I used that instead of opening the cheddar.  Naturally the Sriracha sauce was in the cabinet so it had to be used.  The result was spicy bacony potato goodness.


Sriracha Tater Tot Bombs


tater tots, room temperature
bacon
cheddar or Colby Jack cheese
Sriracha sauce


Cut the cheese in 1/4 inch thick slices the length and width of the tater tots.  Cut bacon slices in half or thirds.  Run a line of Sriracha sauce down the center of each piece of bacon leaving a half inch bare at each end.  Place a piece of cheese and a tater tot in the center of the bacon slice.  Fold one end over the cheese and tot then roll to the end.  Place on a baking sheet seam side down.  Repeat until you have made all you want.  Bake in a 400F oven for 15 minutes.  Turn the tots over and return to the oven for another 10 minutes.  Serve hot.


I started with cutting the bacon slice in thirds but I had to stretch it too much to get any overlap.  A half slice works much better.  Since Colby Jack is a softer cheese than cheddar a bit more oozed out during the cooking than I thought would.  There was still plenty that cooked into the crevasses of the tater tots.  I only made 8 of these for each of us.  If you are going to be making a large batch for several people you should enlist help and make it group effort.
In between the time I started writing this and now, I made these again but with a twist.  The twist is that I smoked them instead of baking them in the oven.  I also used cheddar cheese on these.  I just used a couple of chunks of smoking wood that were laying around.  I'm not certain what they were but I believe they were cherry wood.  Use the smoking wood you prefer.  These weren't as crispy as the oven baked ones but if we hadn't been quite so hungry I'd have moved them to direct heat and crisped them up a bit.  If you're a fan of smoked foods then this is the way to go.  It only took 30 - 45 minutes  to get these smoked.
Smoked Sriracha Tater Tot Bombs ready to eat
If you want something a bit different with a kick then these are just the ticket.  If you want, try the Sriracha sauce with the version where they are rolled in brown sugar.  Heck, even I may give that a try someday.


Give these a try and let me know what you think.


Uncle T

Wednesday, May 4, 2016

Grilled Octopus and Asparagus

The same day we got the squid mentioned here, 1 May post, we also got an octopus.  It's been a bit since we've done octopus so given the price it was too hard to resist.  The last octopus I finished in the skillet so I decided this one would be finished on the grill

I know, octopus has an ick factor for a lot of people in the US.  The  trouble is two-fold, octopus is not in the usual realm of seafood and too many Americans are just too squeamish when it comes to anything other than beef, pork, or chicken.
1.5 lb Octopus waiting for the water to boil
Part of the problem is that octopus done wrong is incredibly chewy.  I mean like chewing a rubber band chewy.  The same problems afflict squid.  I don't mind though, that means more squid and octopus for us at better prices.  I prefer an octopus in the 1.5 lb to 2 lb range for a meal for the good wife and me.


The octopus just needs to be simmered for a bit to tenderize it prior to finishing it in the manner you prefer.  This is also a good time to add some flavor to the octopus.  To do this you just add some aromatics to the pot as you bring the liquid up to a boil.  I use water for this though I know some folks use wine or a wine and water mix.  It's up to you.  The aromatics I use generally vary by what I have on hand at the time.  That means the recipe can be changed to suit what you have available.


Grilled Octopus


1 octopus for every two people
2 sweet peppers, cut in half
3 large cloves garlic, slightly crushed
1 Tbs salt
1.5 Tbs black peppercorns
1.5 Tbs juniper berries
2 cinnamon sticks
1 medium onion, quartered
water
olive oil


The octopus should come already cleaned unless you are buying at the dock.  Remove the beak if it hasn't been done.  Put enough water in a large pot to just cover the octopus.  Add all the other ingredients except for the olive oil and bring to a boil.  Once it has come to a boil, dip the octopus tentacles in the boiling water three times.  Keep the tentacles in the water for a few seconds each time you dip it.  This will ensure the tentacles curl up nicely.  After the third dip, if the tentacles are curled to your satisfaction, put the whole octopus in the boiling water.  Cover and reduce to a simmer.  Simmer the octopus until a sharp knife can penetrate the octopus fairly easily.  This is usually 60 - 90 minutes.  Once the octopus is to this point, remove it from the pot and set on a plate.  After the octopus is on the plate it's time to fire up the grill.  Get the grill good and hot.  Once the grill is hot, drizzle some olive oil on the octopus and place it on the grill.  Grill on one side for 5 - 10 minutes then turn the octopus over.  Grill for another 5 - 10 minutes.  Remove the octopus from the grill and cut in half.  Serve and enjoy.
Just off the grill
The wide range in grill time is so you can do it to suit your tastes.  The longer it is on the grill the more crispy bits there will be to add another bit of texture.


We had an asparagus dish to accompany the octopus.  I came up with this after having asparagus wrapped in prosciutto.  While I like prosciutto, it was not always readily available in some of the locations the Army had me stationed.  Enter the bacon.  Yes, I know the two are nothing alike.  Remember, I'm from small town South so bacon or bacon grease is in lots of different foods.  This is one of our favorite ways to eat asparagus though we don't do it all the time.  It is a great dish though.  I typically call it Transcendent Asparagus it is so good.


Transcendent Asparagus


1 lb asparagus
1 lb bacon
shredded mozzarella cheese


Prepare the asparagus by cutting off the tough bottom part.  Depending on the size of your asparagus divide it into bundles of 2 - 3 spears.  Wrap each bundle in bacon, using either a half slice or a whole slice.  Place the completed bundle in a baking pan and continue until all the bundles are wrapped.  Sprinkle a heavy layer of the shredded mozzarella on top of the bacon.  Put into a 400F oven for 20 minutes.  You can go shorter or longer depending on how dark you want the cheese to get.  Serve and enjoy.  3 or 4 bundles make a good side dish and this can serve 4 at that rate. 
All wrapped up and ready for cheese
A word of warning, if  you use whole slices of bacon you'll end up with quite a bit of bacon grease in the pan.  If you don't want to mess with the bacon grease in the pan you could partially cook the bacon prior to wrapping around the asparagus.  Using a half slice will yield less bacon grease but still be enough to cook the flavor into the asparagus.
Bacon wrapped Asparagus with Mozzarella Cheese ready for the oven
See, we match the unusual menu choices with things that are familiar.  This is the way most likely to get someone to try something different.  We had leftover sprouted rice and quinoa also which was a nice combo with the octopus and asparagus.  Roasted potatoes also go well with this meal instead of the grains if you prefer.
A fine supper
Give one or both of these a try.  I think you'll like them.  If you try them let me know what you think.


Uncle T


Monday, May 2, 2016

Taco Burgers

While we try to have a widely varied menu throughout the week we generally only have 4 choices for supper on Saturday night.  This past Saturday we opted for hamburgers since it had been a bit since we'd had those.  Hamburgers require little prep since I buy large chubs of ground beef and make 5 ounce patties with the burger press and freeze them.  So all I had to do was pull out a package and defrost them.


OK, the little prep is a bit inaccurate since I did make hamburger buns instead of buying some.  Using the stand mixer makes that go faster and most of the time in making hamburger buns is spent letting the dough rise.  I use the recipe found here, Hamburger Buns.  This recipe can be used to make great hotdog buns/hoagie rolls simply by altering the shape.  They are so much better than anything  you'll find at the store, both in flavor and texture.


Usually we have Saturday night leftovers for lunch on Sunday but with burgers we generally don't have any.  The main reason we don't have any is that I put 2 patties per package.  Yeah, I know I should package them by fours or thaw more.  Since I had a chub of ground beef to divide into 1 lb packages I decided to do something a bit different.  I made taco burgers for lunch on Sunday.


After lunch was done I did a Google search for taco burgers and while I found lots of recipes I didn't find any quite like mine.  So, I'm taking credit for this one.


Taco Burger


1 lb ground beef
hot taco seasoning, 1 packet if using store bought
4 dashes Uncle T's Devil Sauce, use the hot sauce of your choice if desired
shredded Mexican blend cheese
1 cup salsa
leaf lettuce
cilantro


Mix the ground beef and taco seasoning thoroughly.  Add the hot sauce if desired and mix well.  Form into burger patties.  Drain the salsa of most of its liquid and set aside.  Place patties on hot grill and leave them alone for 5 minutes then turn them over.  Once they are turned over, place a pile of the shredded cheese on each burger and close lid to help cheese melt.  The buns can be split and put on the grill to toast at this time if desired.  Check after 3 - 4 minutes to see if the cheese is melted to your satisfaction.  Remove burgers from the grill.  To assemble the burger place 3 or 4 leaves of lettuce on the bottom bun.  Put the burger on the lettuce then top with 2 or 3 sprigs of cilantro.  Top with some of the drained salsa.  Put the top of the bun on and enjoy.
Fully Assembled Taco Burger
For these burgers I used my gas grill since it's a little quicker to get going.  The gas grill was preheated to 500F according to its thermometer with both burners on High.  Once the burgers were on and the lid closed the burners were reduce to Medium.  I know people like to fiddle with meat on the grill but leave them alone.  They only need to be flipped once and definitely don't mash the burgers with the spatula.

The lettuce and cilantro came out of the garden about 10 minutes before they got put on the burgers.  The taco seasoning I used was my own blend.  I combined parts of two recipes I found online and upped the heat a bit.  I'm still tweaking that recipe but I'm close to what I'm wanting.  I did use store bought salsa as we didn't can any last summer.  We had tater tots with the burgers since that is what I had in the freezer and didn't want to take the time to do homemade French fries.  The tots were seasoned with homemade seasoning salt.  We did the same thing with the regular burgers on Saturday night.
Taco Burger with Tater Tots
So if you are tired of the same old hamburger give the taco burger a try.  You can tweak the recipe to suit you and your family's taste.  Give a try and let me know what you think.


Uncle T

Sunday, May 1, 2016

Sprouted Rice and Quinoa with Seafood in a White Wine Butter Sauce

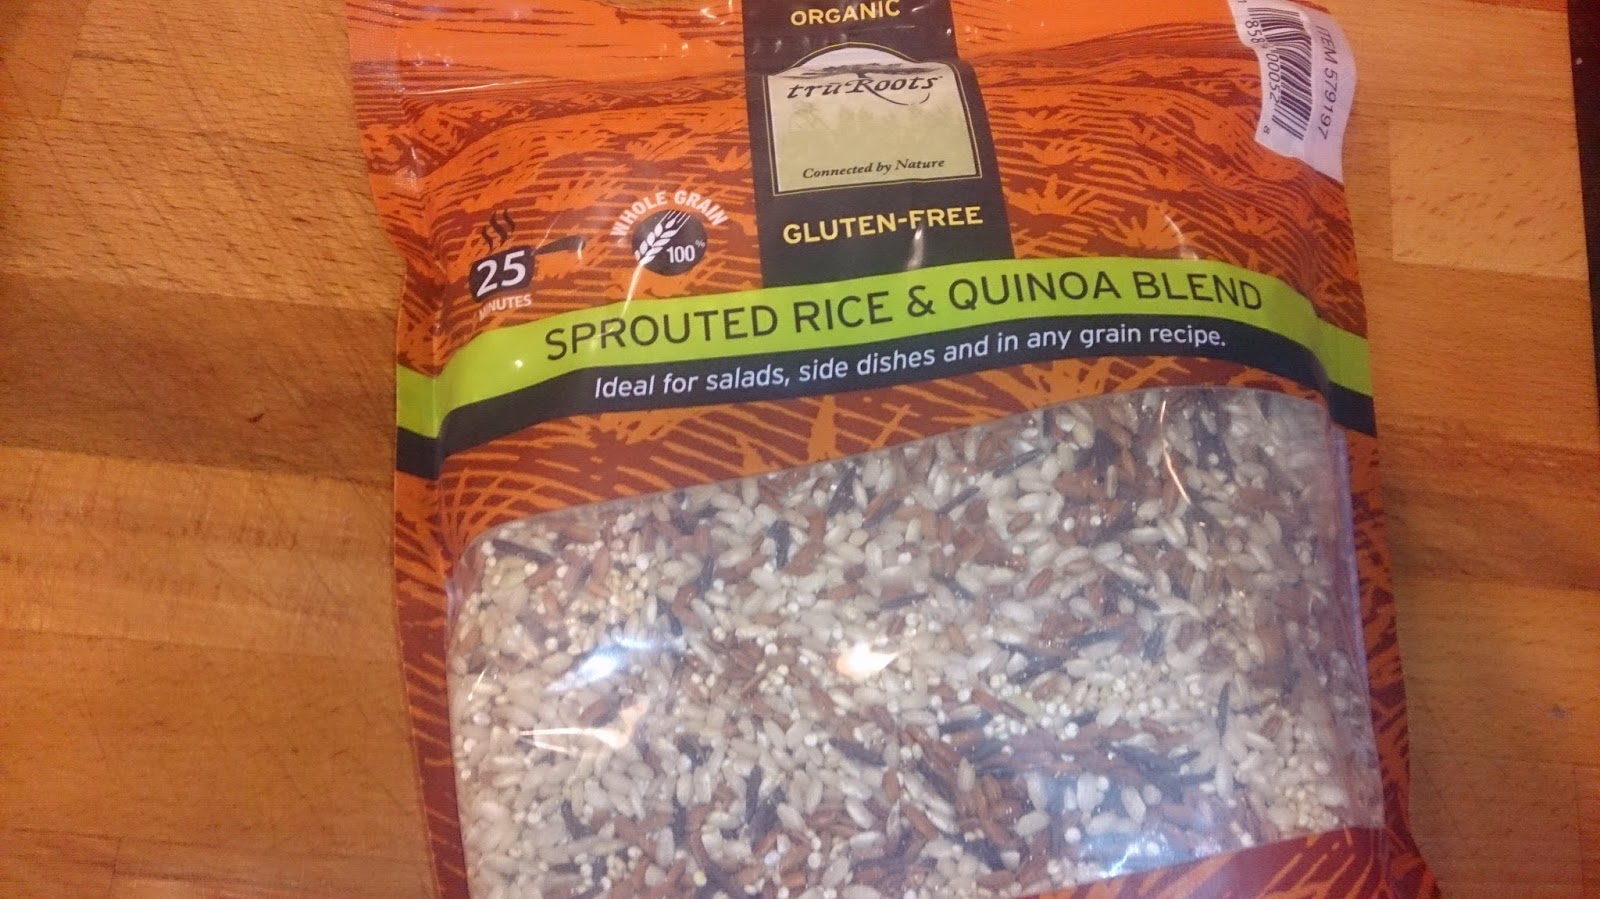
We were doing our grocery shopping this weekend and one of the stops was at BJs.  BJs is a warehouse store similar to Costco and Sam's Club.  One of the things on our list was rice so we checked to see if they had what we were wanting in a manageable size container.  As I turned into that aisle a package caught my eye.  I took a quick look then went further down to look at the rice.  As I returned I stopped to look a bit more closely at the package.  The reason it caught my eye was that it was Quinoa and Sprouted Rice.

Now, we've tried Quinoa since it was the Grain de Jour but weren't sufficiently impressed to continue paying for it.  I've been reading about the changes in both flavor and nutrition in sprouted grains but had not seen any for sale and hadn't tried sprouting my own.  The combo of the two intrigued me so we took a chance and bought the 3 lb bag.  What we got was made by Tru Roots.  If you are not near a store that carries it you can get it here, http://www.amazon.com/truRoots-Organic-Sprouted-Quinoa-Blend/dp/B008KAILNK.

Our next stop was at our favorite international market, Grand Mart, in search of dried mushrooms for a project I have in mind.  I know I've mentioned this store before.  They carry predominantly Asian products and have an excellent fish market.  As we came through the door, my good wife pointed out a sign advertising a sale on squid.  Needless to say, we both got excited.

We ended up getting some squid to use for our Sunday dinner and a nice octopus for supper on Monday.  Yep, expect that post to follow shortly.

Cleaned Squid ready to skin and cut up
I still hadn't decided what I was going to do with the squid until we got home from church Sunday morning.  I had two choices which were pasta with the squid or use the sprouted rice and quinoa blend.  When presented the choice, the good wife chose the sprouted rice and quinoa blend.  After that it was time to get busy.

I cooked the sprouted rice and quinoa in the pressure cooker.  I set it for 7 minutes rather than the 6 minutes for regular rice and let it lose pressure naturally while everything else cooked.  The only extra added to this was the olive oil I used to keep it from foaming.  Once it was done the sprouted rice and quinoa had a nice texture and good flavor.  The texture was slightly chewier than al dente pasta, just enough to know you had something substantial without being tiresome.  The flavor was lightly toasted and quite enjoyable.
A bowl of Sprouted Rice and Quinoa ready for the Seafood and Sauce
So without further ado, let's get into the recipe.

Sprouted Rice and Quinoa with Seafood in a White Wine Butter Sauce

Sprouted Rice and Quinoa
Water
1 lb peeled deveined shrimp, tails removed
1 lb fresh squid, cut in 1/4 inch rings
8 oz baby bella mushrooms, sliced
1 stick butter
1/3 cup Parmesan cheese, grated
1 cup white wine
3 cloves garlic, minced
salt
pepper
fresh herbs, minced (basil, thyme, oregano, sage)

Cook sprouted rice and quinoa according to package directions.  If using an electric pressure cooker, use two cups of the sprouted rice and quinoa and water to the two cup line.  Set time for 7 minutes and allow to naturally release the pressure when the time is done.

While the rice and quinoa is cooking start the seafood and wine sauce.  Melt 1/2 stick of butter in a large skillet.  When it starts to bubble, add the mushrooms and cook until they get some color.  Once the mushrooms are done, add the shrimp and the rest of the butter.  Season the shrimp with salt, pepper, and garlic.  When the shrimp is half done add the squid and the fresh herbs.  After a minute of the squid cooking add the white wine.  Once the white wine is at a simmer add the Parmesan cheese and stir to mix.  Continue to simmer until reduced by half stirring frequently.
Shrimp, Squid, and Mushrooms in a White Wine and Butter Sauce
Once the white wine and butter sauce is reduced remove from heat.  Divide the sprouted rice and quinoa between 4 pasta bowls.  Spread the seafood and mushrooms around the mounds of sprouted rice and quinoa then pour the sauce over the grain mixture.  Garnish with minced parsley and serve.

A tasty filling lunch
Squid is one of those things that need to be cooked fast at a high temperature or a long time at a low temperature.  Simmering the sauce covers the long and low technique.  This gets the squid cooked without being overly chewy.

The good wife has enjoyed most everything I've come up with but this one seemed to make a serious impression.  She actually said this meal was restaurant worthy and was the sort of thing that people would pay serious money on.  Rare praise indeed.

Whether you use this recipe or not I think you should give the sprouted rice and quinoa a try.  It can be used in place of rice in most any dish and as the base for a healthy salad.  Eat it for the flavor and texture if not for the nutrition.  Give both the sprouted rice quinoa mixture and this recipe a try and I think you'll enjoy it.  If you do, let me know what you think.

Uncle T

Wednesday, April 20, 2016

Shrimp Alfredo with Cottage Cheese

There is a dairy that still delivers that we were introduced to shortly after we moved to this area.  A representative had a booth set up at a farmer's market in one of the local cities.  Of course she had samples and was signing people up for delivery.  I tried the whole milk and the chocolate milk and was blown away.  The whole milk was the best tasting milk and closest to raw milk I've come across.  As a result, we have a standing order consisting of whole milk, 2% milk, 1% and 4% cottage cheese, and eggs that get delivered each week.  If you live in an area where Oberweis delivers you are lucky and should look into getting your milk through them.


I used to take the 4% cottage cheese to work and eat it throughout the week.  Due to a couple of office moves I'm not eating near as much as I used to.  Since I had forgotten to cancel the 4% cottage cheese from the order for a few weeks we ended up with way too much 4% cottage cheese on hand.  One evening the good wife declared that I need to eat more cottage cheese or find a way to cook with it.


I looked online for cooking with cottage cheese and found some bread recipes that I'm wanting to try.  I had thought about using it for a pasta sauce and had it planned out when I decided to Google cottage cheese pasta sauce.  I found plenty of recipes for making an Alfredo type sauce using cottage cheese but they all called for low fat cottage cheese and either 1% or 2% milk.  You know Uncle T doesn't play that way.  In the end, I went with the plan I already had and it turned out great if I do say so myself.


Shrimp Alfredo


1 - 1.5 lb peeled deveined shrimp, large 31-35
1 recipe fresh pasta or 1 lb dried fettuccini
1 cup whole milk
16 oz 4% cottage cheese
3 Tbs butter
3 large cloves garlic, sliced
3/4 cup grated parmesan cheese
2 Tbs olive oil
salt
pepper
nutmeg
garlic powder


Sauce


Melt butter in a pot and add the garlic.  Cook until the edges of the garlic turn golden.  Add the milk and bring to a simmer.  Add the cottage cheese and stir to mix well.  Bring to a simmer and add the parmesan cheese and stir to combine.  To help speed the melting of the cheese use an immersion blender to break up the cottage cheese.  Season with a pinch of nutmeg, a pinch of pepper, and a pinch of salt and stir.  Once the cheeses are melted keep the sauce on low heat until everything else is ready.


Fettuccini


If making fresh pasta, cut the noodles and cook in heavily salted water.  Prepare dried fettuccini according to the manufacturer's instructions.  Time the pasta to be almost done at the same time the shrimp are almost done.


Shrimp


Remove the tails from the shrimp and season with salt, pepper, and garlic powder before you start the sauce.  Once the sauce is done, heat a large skillet and add the olive oil.  Once the olive oil is hot add the shrimp.  When the shrimp are half done, turn them over to finish cooking.


Once the shrimp have been turned over remove the fettuccini from the pot and add to the skillet.  Don't worry about any extra pasta water that gets in the skillet.  Pour in half the sauce and stir to combine.  Keep adding sauce a little at a time until all the pasta and shrimp have a light coat of sauce.  I had about 1/3 of the sauce left.  Once all the components are mixed it is time to eat.  Serve and enjoy.  Makes 4 servings.
Shrimp Alfredo made with Cottage Cheese
I had sauce left over because we don't like to have the shrimp and pasta swimming in pool of sauce.  If you like lots of sauce then add it all.  My left over sauce will be used in a potato soup so be on the look out for that in the future.


I used my immersion blender to help things along but it is not necessary.  The cottage cheese and parmesan cheese will melt while you stir but will take longer.  If you want to speed things up and don't have an immersion blender carefully pour the sauce into a regular blender to reduce the size of the curds then return the sauce to the pot.


Do be sure to use good parmesan cheese for this.  If you use pre-grated cheese make sure it is a good quality parmesan.  If it is sitting out on the store shelves don't get it, look in the dairy cooler.  Of course grating a wedge of parmesan would yield the best sauce.  I use a good quality grated parmesan that I find in the dairy cooler.


This is a rich creamy sauce that is still lighter than a traditionally made Alfredo sauce made with heavy cream.  If you want to try it with low fat milk and 1% cottage cheese go ahead but I'll not guarantee the results.


Give this a try and let me know what you think.  I do believe you'll enjoy it.


Uncle T

Saturday, April 9, 2016

Fun with Fermentation - Giardiniera

Giardiniera is an Italian/Italian American relish of pickled vegetables typically done in either vinegar or oil.  It can be found in hot or mild varieties.  Depending on where you are seems to determine how it is used.  The Italian version is eaten as an antipasto or with a salad.  In the US, it also gets used as toppings for Italian beef or sausage sandwiches in Chicago.  Some people even use it in pasta.


This is one of those foods that can basically be used/eaten however you wish and it will be good.  The good wife likes it and has been wanting some.  OK, the good wife likes just about any pickled vegetable but that's beside the point.  Since lacto-fermentation is a form of pickling I thought it would be a good thing to make some rather than buy a jar.


I went to the condiment aisle to look at some jars of giardiniera to see exactly what was in the commercial varieties.  The only thing they had that I didn't use was olives.  We could have bought some olives to add but I wasn't sure how or if they would affect the fermentation so we did without.


Since we will eat it out of the jar or as a component of a charcuterie and cheese meal I chose to cut the vegetables in good sized chunks.  If we want to top a sandwich with is we can chop it up some more.  What I ended up using made two quarts.


Lacto-fermented Giardiniera


1 head cauliflower
1 red bell pepper
1 green bell pepper
2 stalks celery
3 medium carrots
1 head garlic, optional
2 - 4 hot peppers, optional
4 tsp salt, non-iodized
4 cups water, non-clorinated


Boil enough water to fill the quart jars and let them sit until ready to pack the vegetables in.  Separate the cauliflower into bite sized florets and place in a large bowl.  Cut the bell peppers into 3/8 inch x 2 inch strips and add to the bowl.  Cut the celery into 3/8 - 1/2 inch pieces and add to the bowl.  Cut the carrot on the diagonal into 3/8 - 1/2 inch pieces and add to the bowl.  Slice the peppers, if using and add to the bowl.  Separate and peel the garlic cloves and set aside.  Thoroughly mix the contents of the bowl.  Dump the hot water out of the quart jars.  Start putting the vegetable mixture in each jar adding the garlic cloves to equally distribute. Pack them tight and leave space at the top.  Mix the salt and water to make your brine and fill to the rim.  Put the lid on but don't crank it down hard, fermentation gas and some liquid needs to be able to escape.  Put jars in a pan to catch overflow and put in a warm place in your house while keeping them out of direct sunlight.  In 7 - 14 days, temperature and taste depending, you'll have some tasty fermented giardiniera.  This batch was good at 12 days.
Quart jars of vegetables ready to start fermenting
Once the desired level of flavor is reached, tightly cap the jars and put them in the refrigerator.  Putting them in the refrigerator will slow/stop the ferment and will help maintain the texture of the vegetables.  These will not be super crunchy but you can possibly help preserve some of the crispness by adding some tannin to the mix in the form of oak or grape leaves.  I didn't bother with that and the peppers ended up pretty soft.


The vegetables need to stay submerged during the entire ferment else you run the risk of mold development.  If they are tight packed they may stay submerged on their own.  If not use a weight of some sort to keep them under the brine.  In my gallon jars of sour kraut I use a ziplock bag filled with the brine to keep the cabbage submerged.


Some people call for 1 Tbs salt to 2 cups water which is slightly more salt than I use.  I find, with softer vegetables anyway, that the end result is a bit too salty to my taste.  The primary purpose of the salt is inhibit undesirable bacteria until the lactobacillus has taken off. 


One of the side effects of pickling garlic this way is that it can turn blue or green.  This is perfectly normal and it is safe to eat.  The color change is just a chemical reaction between a couple of enzymes found in garlic or between one of those and the salt.  There may be no color change at all.  If there are no bad spots on the garlic and you don't bruise it when peeling you have a better chance of it staying its natural color.  I had to cut out small bad spots on a few cloves so I got some blue garlic.


In addition to being tasty, lacto-fermented foods are high in probiotic bacteria which we all need.  Supposedly, these bacteria have a whole host of benefits that range from helping your skin look good to weight loss.  They do help keep your digestive tract healthy by maintaining a large variety of microorganisms in your gut.


If you don't like this mix, that's OK.  Select the vegetable/vegetables you like at start fermenting.  You'll get some tasty food and if you share you get to tell them you made it.  Give them a try and let me know how you like them.


Uncle T